Getting started
Sign up, create your venue, verify your mobile number, then work through the Getting started card on the Today page until all 7 steps are done. All pictures are from a phone. The sign-up pages are in Thai only; the dashboard is shown in English (switch it with the language button at the top).
What you need
An email address you can open, or a Google account
A mobile phone that receives SMS, to verify the owner's number
Your venue's PromptPay number or bank account. Booking money goes straight into it
If you have them: your logo as a square PNG or JPG up to 2 MB, and your venue's Google Maps link
1. Sign up as a venue owner
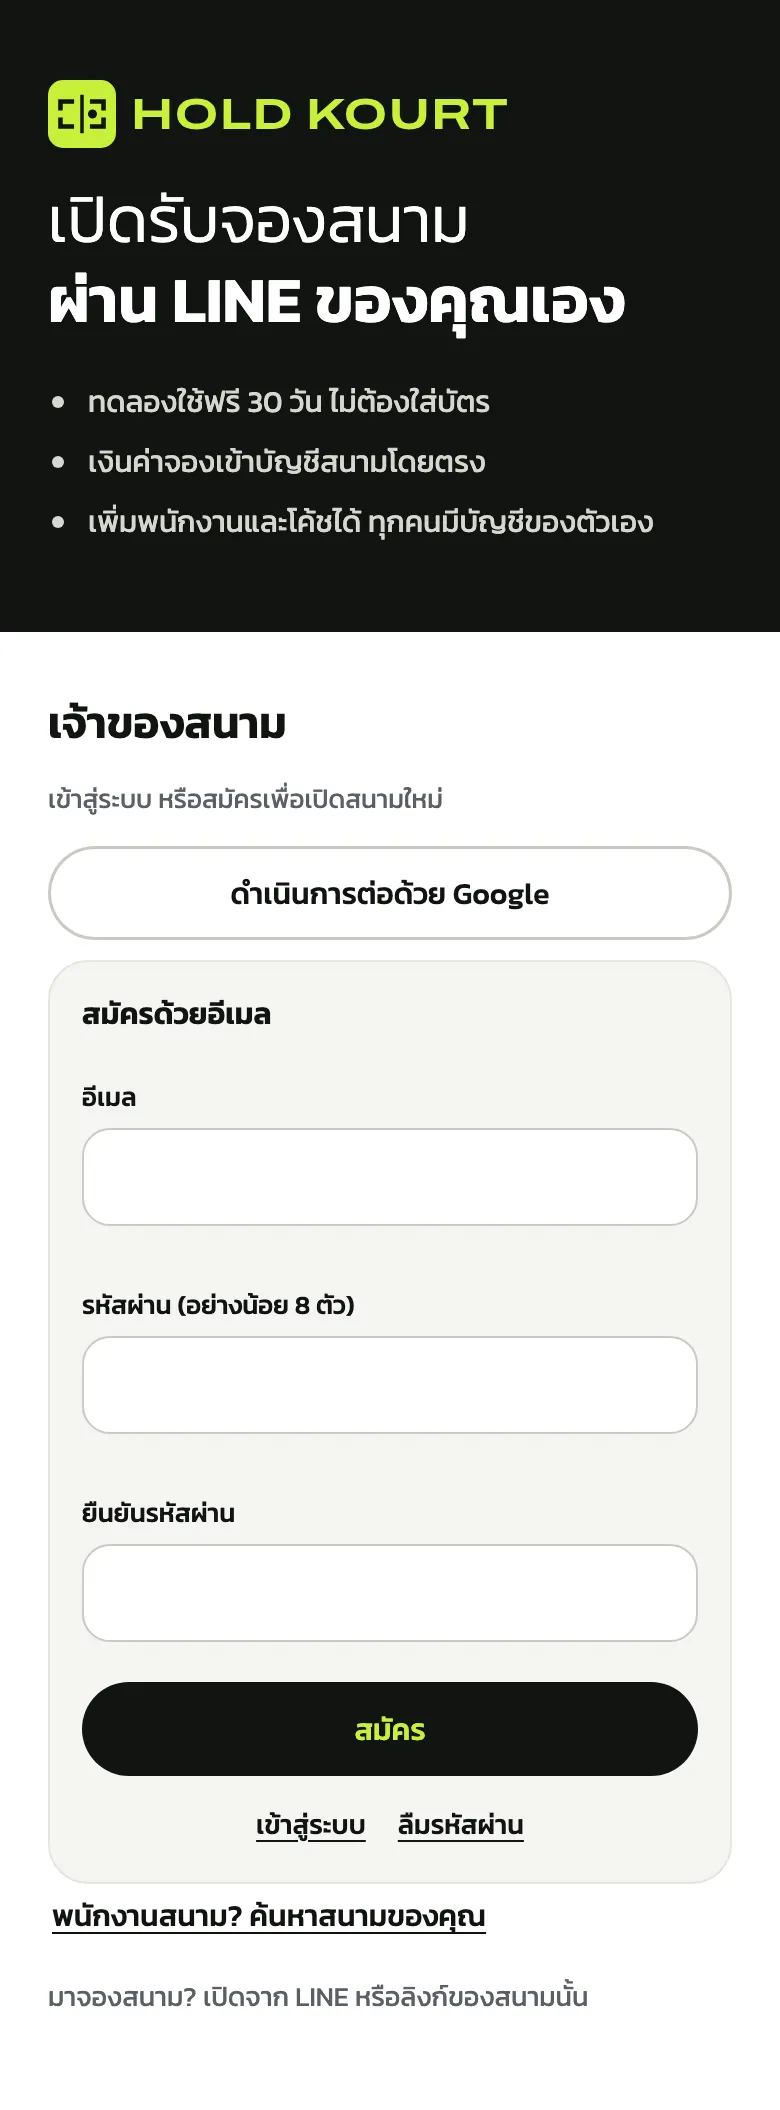
On holdkourt.com/en, tap “Sign up free”. The owner page “เจ้าของสนาม” (venue owner) opens, in Thai only
Tap “ดำเนินการต่อด้วย Google” (continue with Google), or fill in the “สมัครด้วยอีเมล” (sign up with email) box: email, a password of at least 8 characters, the password again, then tap “สมัคร” (sign up)
Inside the LINE, Facebook or Instagram app, Google sign-up doesn't work: open the page in Safari or Chrome, or sign up with email
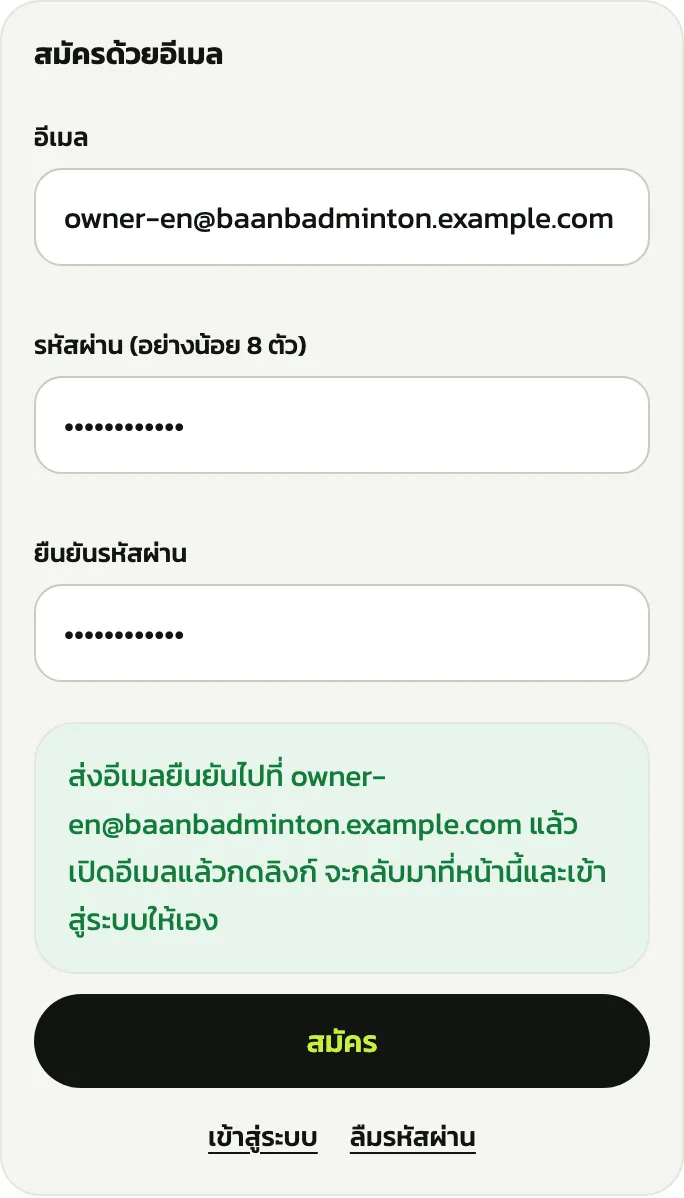
With email: we send an email titled “Confirm your email address”. Open it and tap “Confirm email address”; you come back to this page already signed in. Google sign-up needs no confirmation
2. Create your venue
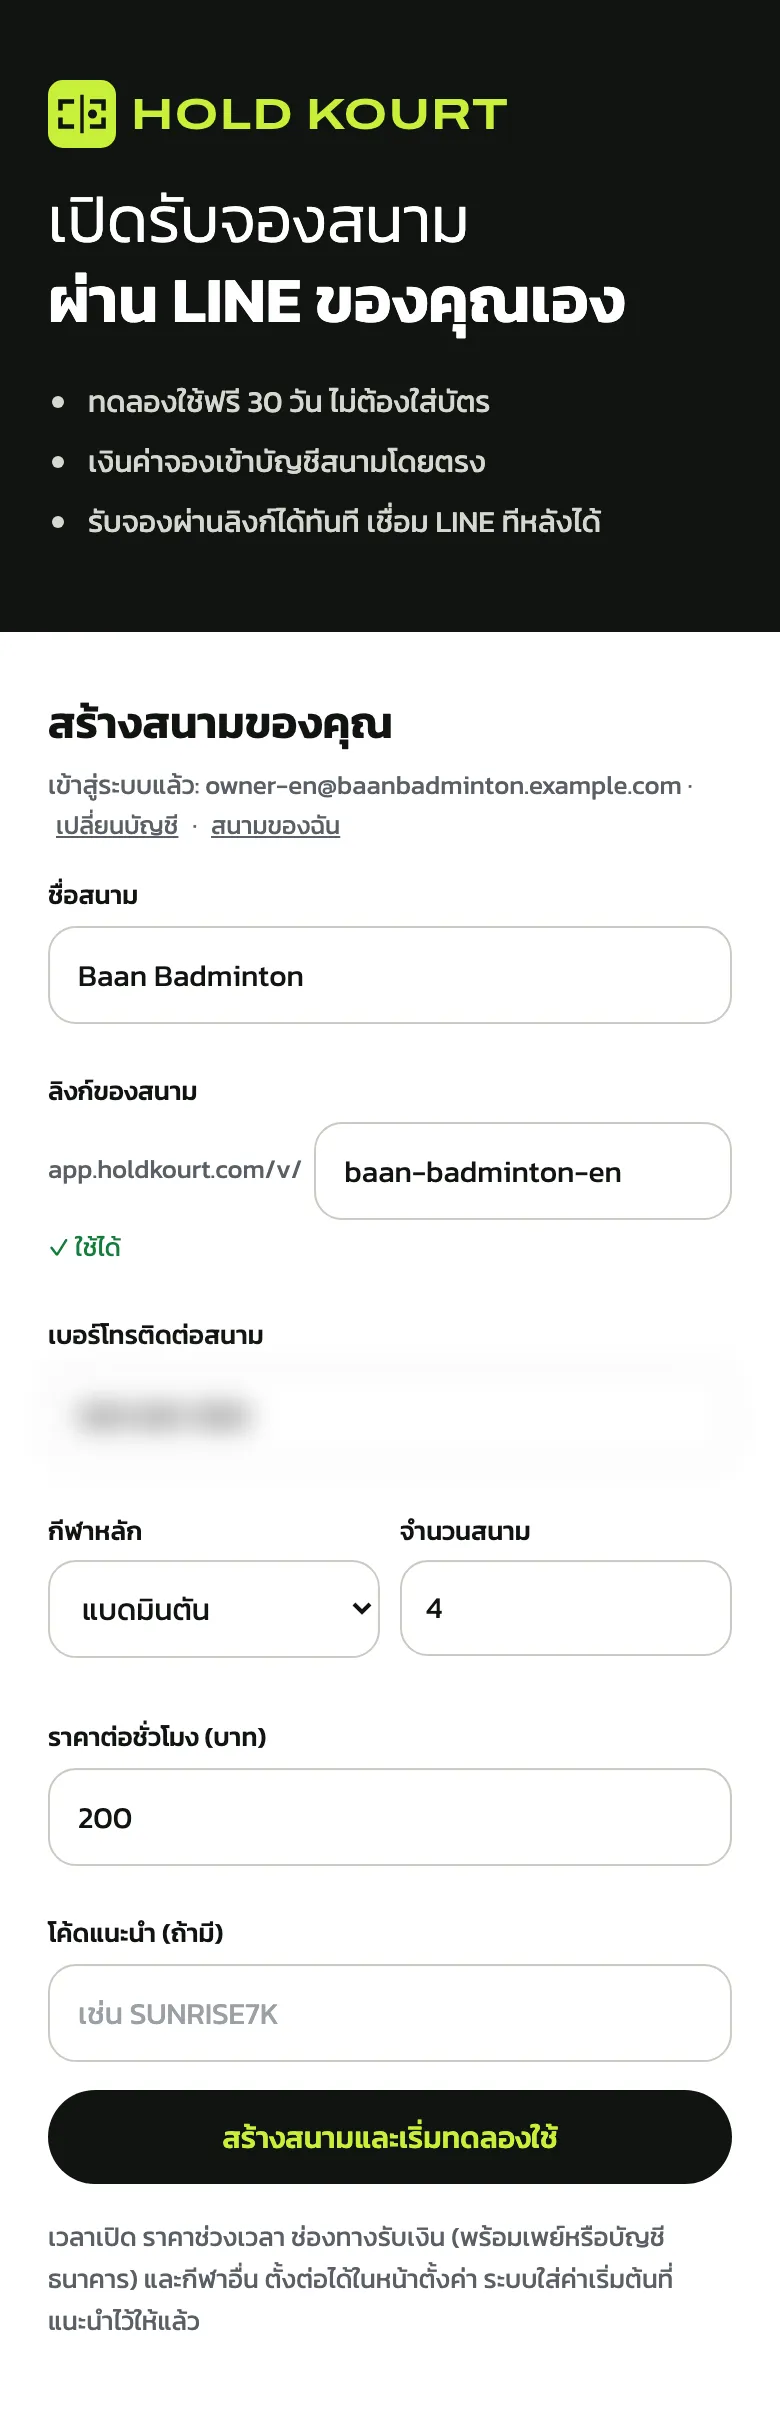
Fill in “ชื่อสนาม” (venue name) and “ลิงก์ของสนาม” (your link: lowercase letters, digits and hyphens; customers open it to book). Wait for “✓ ใช้ได้” (available)
Fill in “เบอร์โทรติดต่อสนาม” (venue phone), pick “กีฬาหลัก” (main sport), enter “จำนวนสนาม” (number of courts, 1–30) and “ราคาต่อชั่วโมง (บาท)” (price per hour in baht), then tap “สร้างสนามและเริ่มทดลองใช้” (create venue and start the trial)
Your account's first venue gets a 30-day free trial with no card. Opening hours, prices by time and other sports can be set later in Settings
3. Verify your mobile number
“Verify your mobile number” comes up before the dashboard. If the venue phone you entered is a mobile, it is already filled in (a landline can't get SMS, so the field stays empty for your mobile). Tap “Send code”
Verify by the date and time in the orange box (14 days after creating the venue), or the venue and all its data are deleted. Customers never see this number
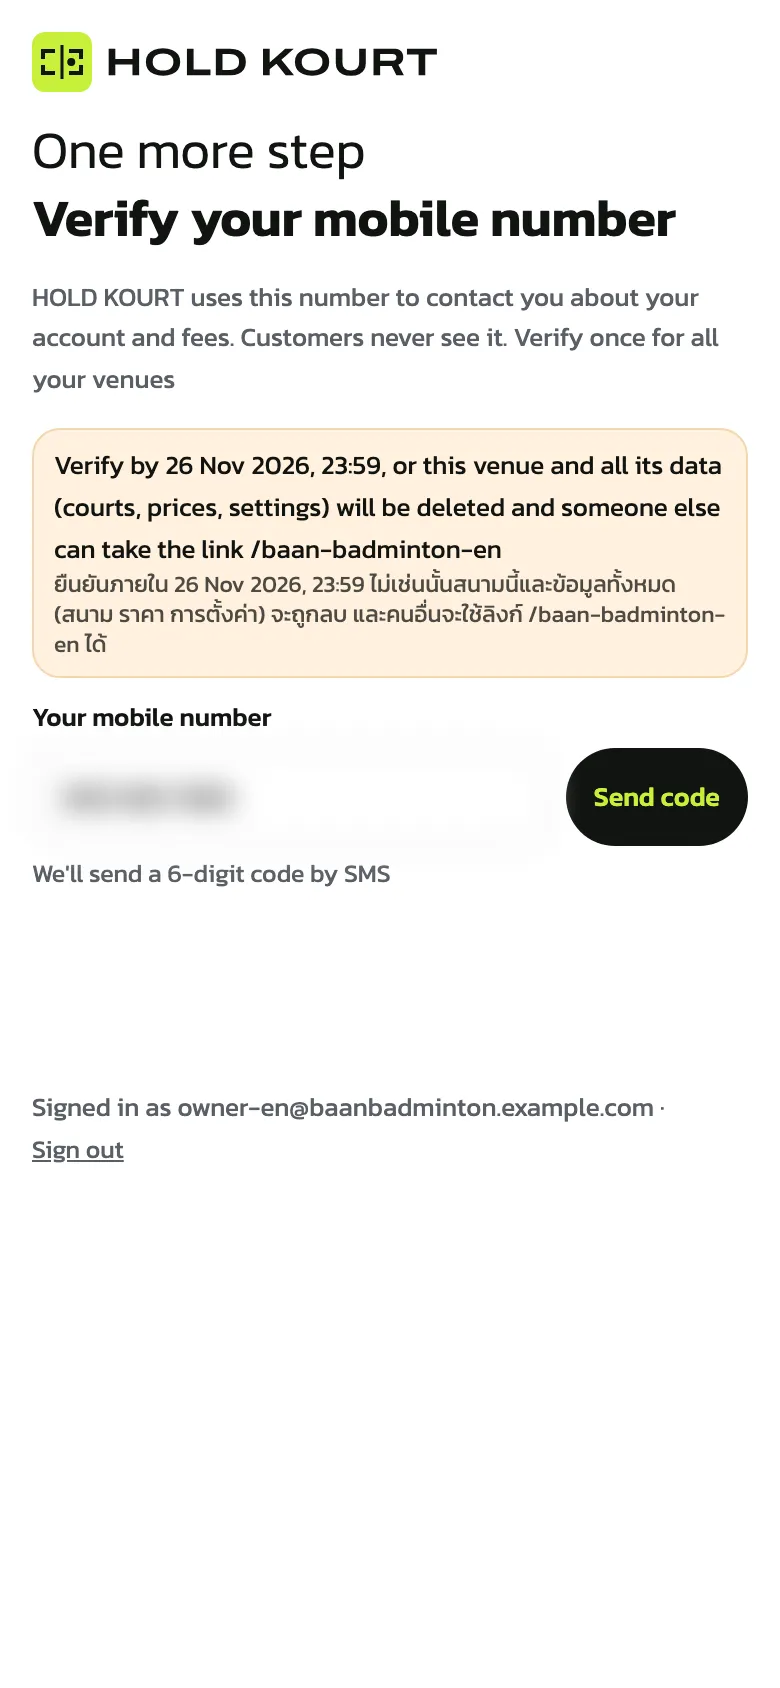
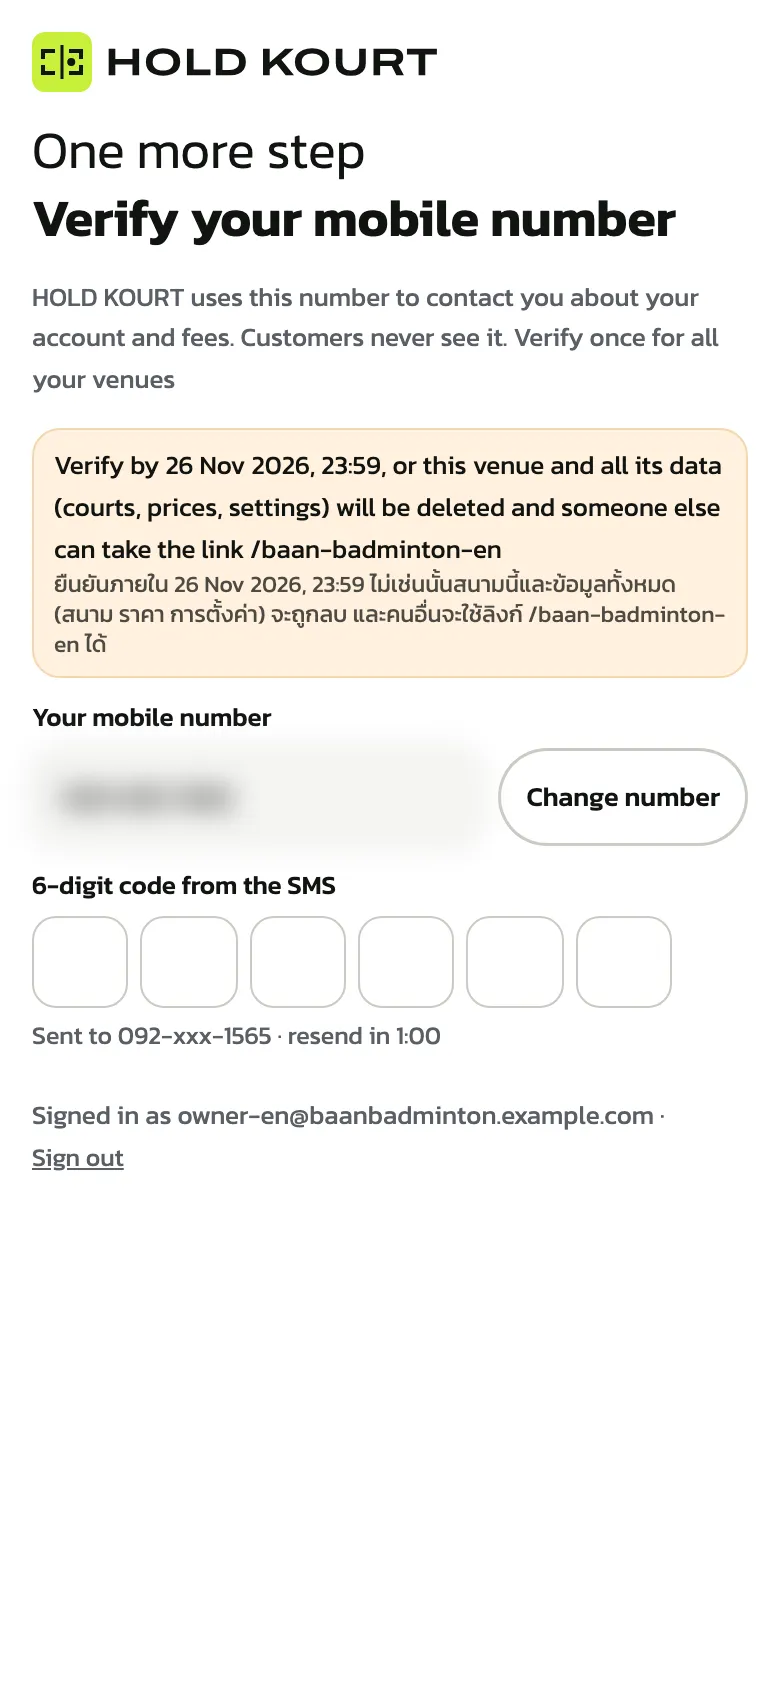
Type the “6-digit code from the SMS”; once all 6 digits are in, it verifies by itself
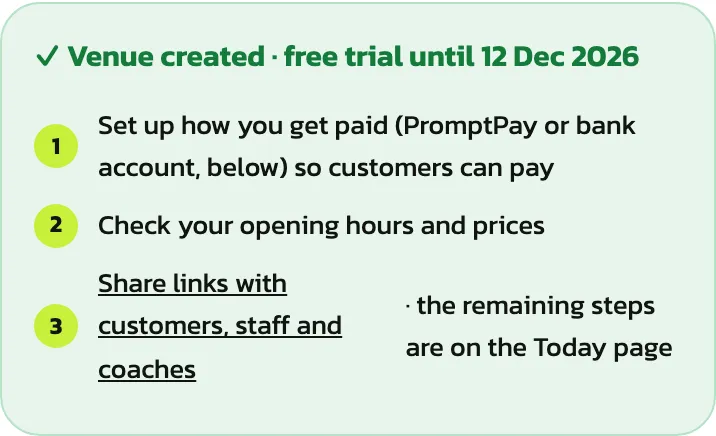
You land in “Venue settings” on “Payment methods”, with a green box showing when the free trial ends
4. The 7-step “Getting started” card
Open “Today” (on a computer: “Today's bookings”). The “Getting started” card at the top names your next step; “Do it” opens that step's page
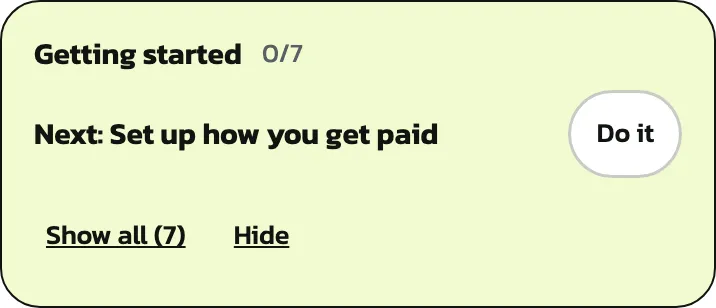
“Show all (7)” lists every step. Optional steps have a “Skip” button that says what skipping means. “Set up how you get paid” and “Share the link with customers” can't be skipped
Only the owner sees the card, during the first 30 days after creating the venue. Skipped steps and shared links are remembered per device. “Hide” puts the card away
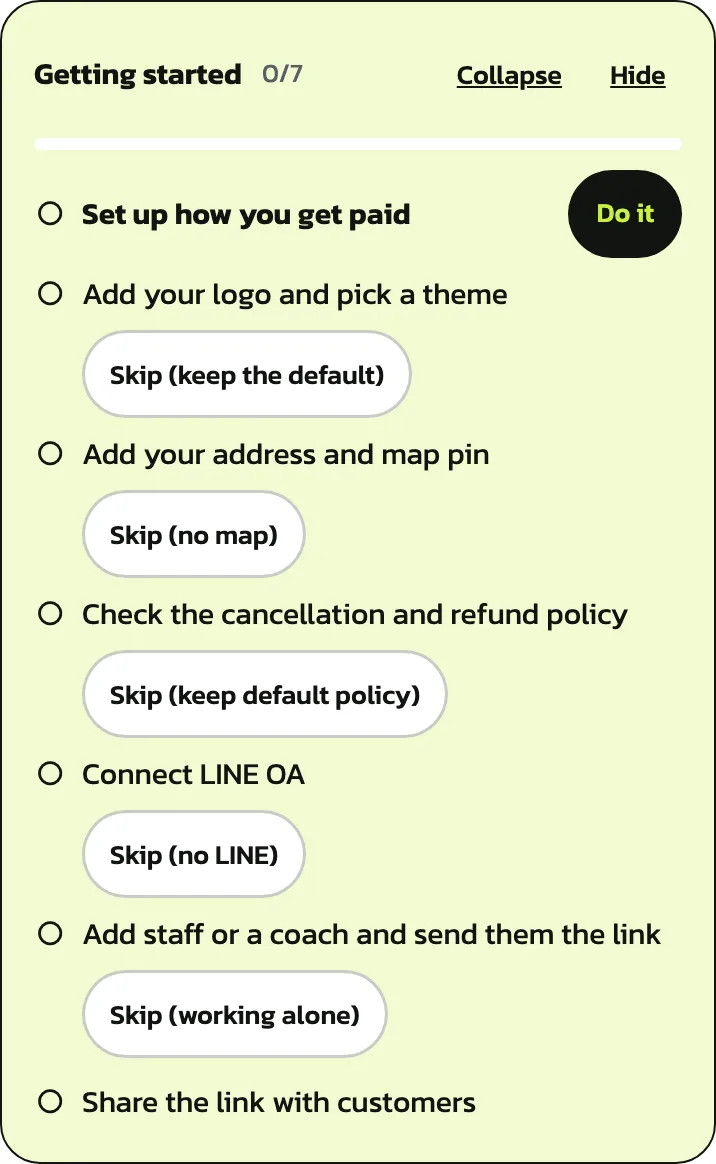
Step “Set up how you get paid”
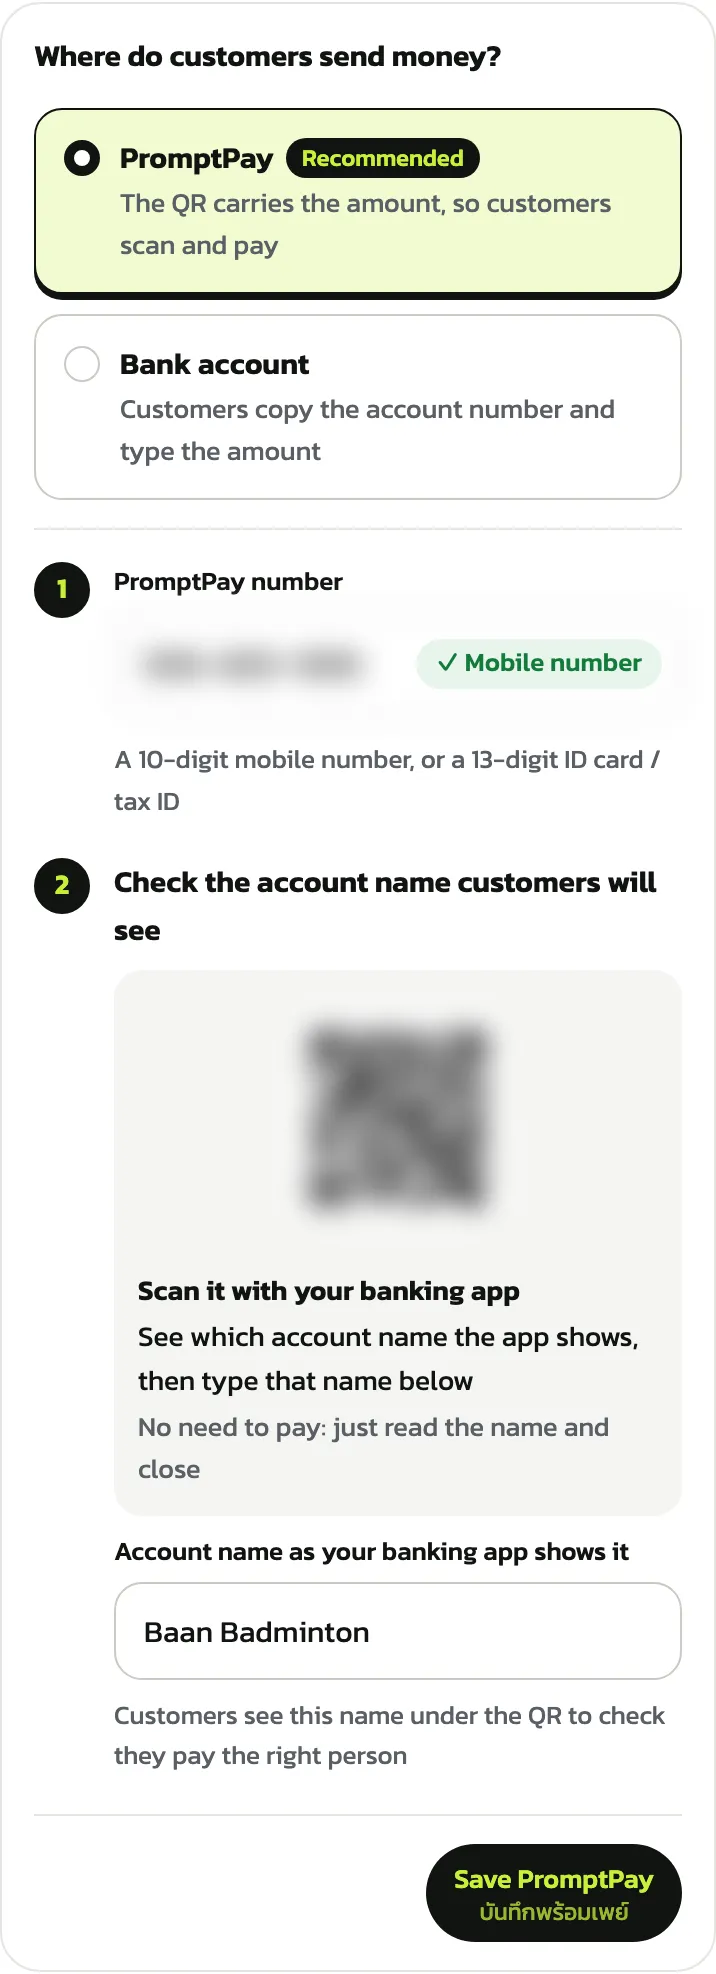
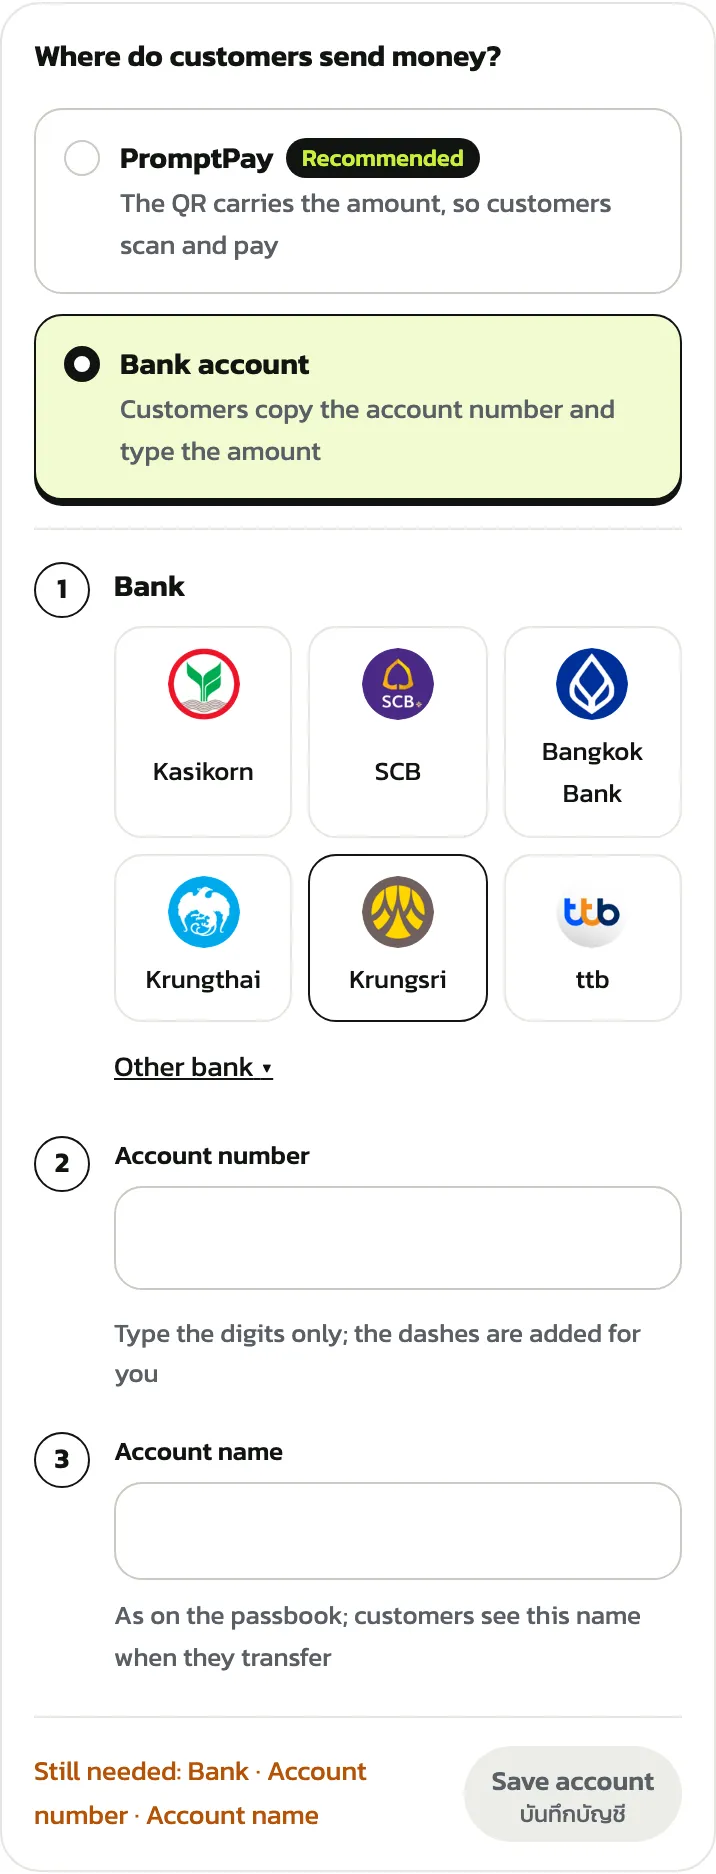
In “Venue settings › Payment methods”, choose “PromptPay” (the QR carries the amount) or “Bank account” (customers copy the number and type the amount). One method at a time, and only the owner can change it
PromptPay: enter the “PromptPay number” (a 10-digit mobile number, or a 13-digit ID card or tax ID), scan the test QR that appears with your banking app, see which account name it shows, and type that name in “Account name as your banking app shows it”. No need to pay. Tap “Save PromptPay”
Bank account: choose “Bank account”, tap your bank (not listed? “Other bank”), enter the “Account number” as digits only (10–15; dashes are added for you) and the “Account name” as in your passbook, then tap “Save account”
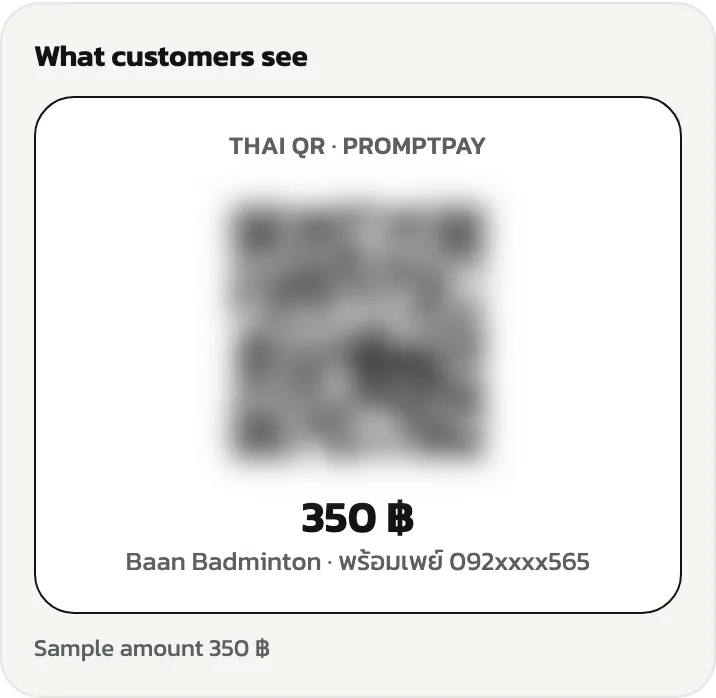
“What customers see” shows the QR customers get when they pay, with the account name under it
Step “Add your logo and pick a theme”
In “Logo and theme”, tap “Upload logo” and choose a square PNG or JPG up to 2 MB. It saves at once and the button turns into “Change logo”
The card ticks this step once a logo is uploaded; picking a theme alone doesn't

Under “Customer page theme”, tap a theme, then “Save” at the bottom. The theme sets the colours and shapes of every booking page your customers see
No logo yet and happy with the default theme? “Skip (keep the default)” on the card; add them later
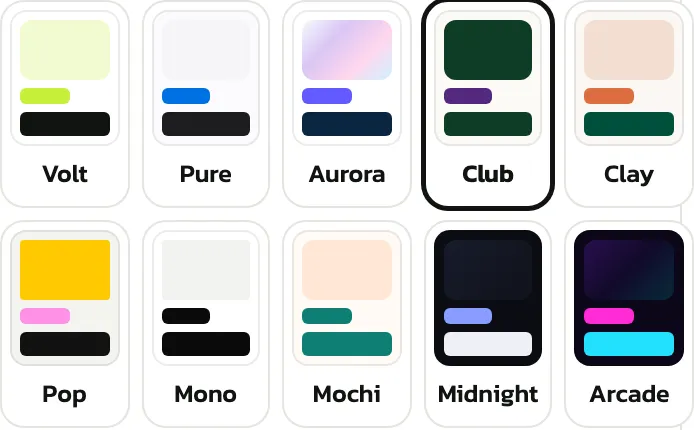
Step “Add your address and map pin”
In “Venue details”, fill in “Address (customers can open it in maps)” and tap “Pin the venue”
Paste your venue's Google Maps link (in Google Maps: Share → Copy link) or type a name or address to search. Move the map until the pin sits on the entrance, then tap “Use this location”
If it says the link has no coordinates, search by name or address instead, or drag the map to the venue
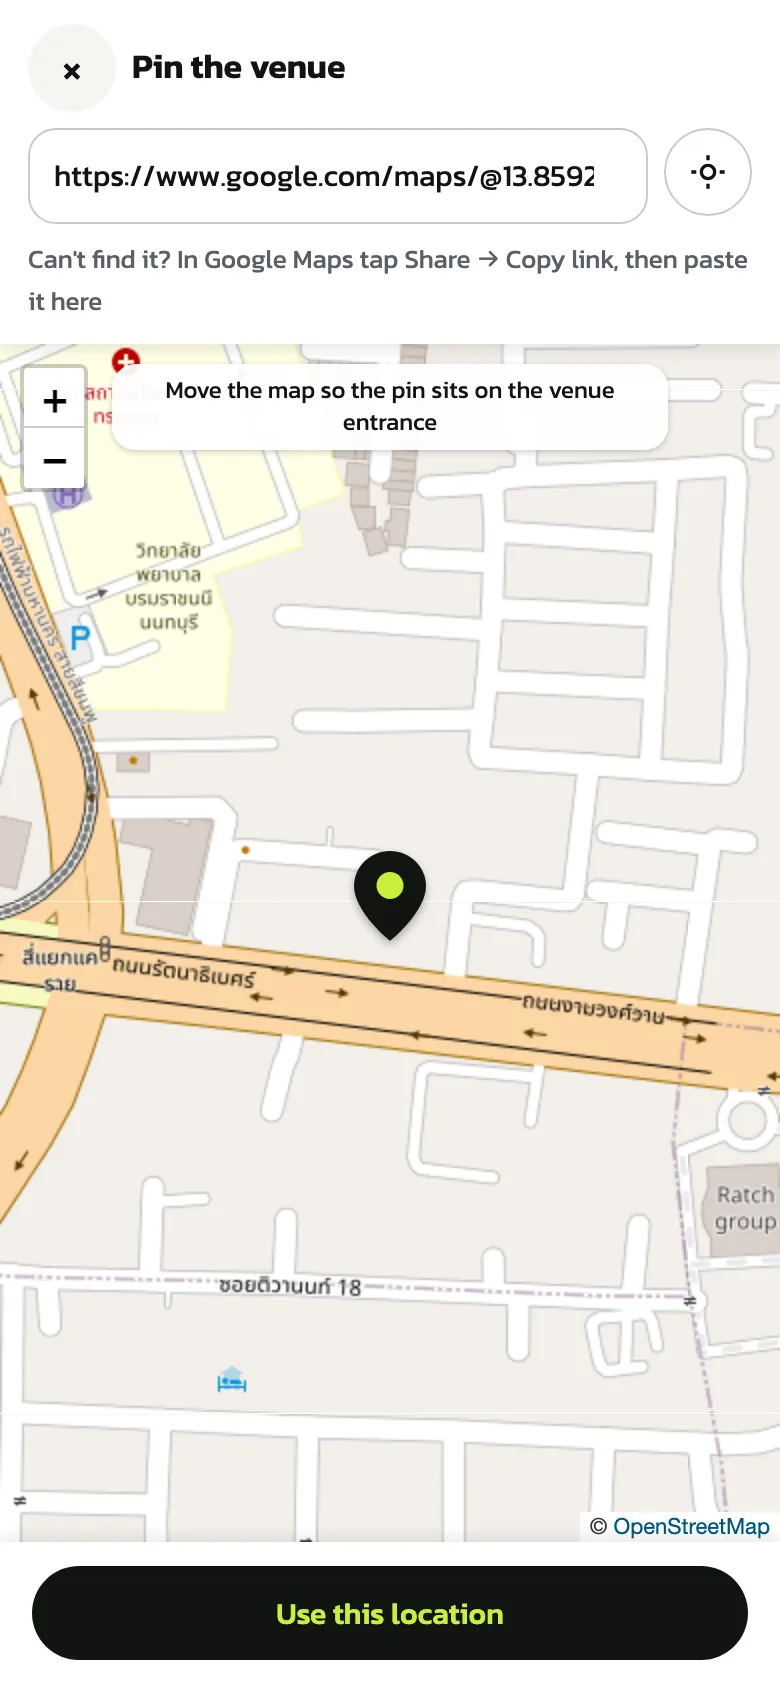
“Pinned. Customers' directions lead to this pin” appears. Tap “Save” in the “Address and map” box
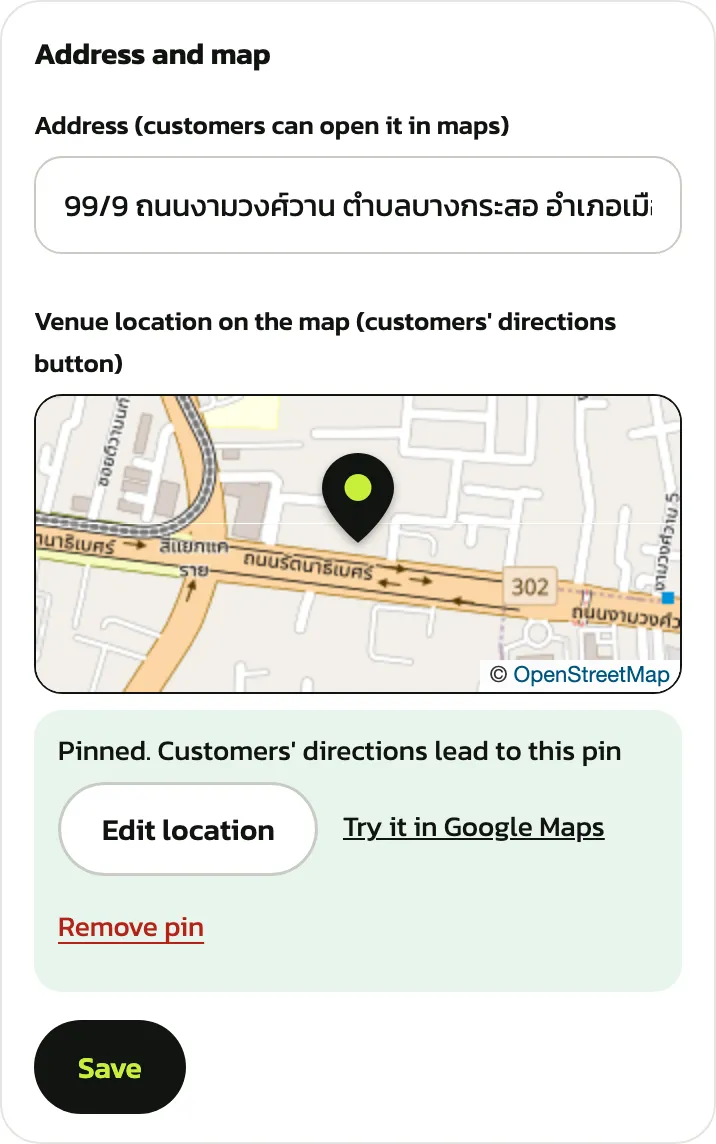
Step “Check the cancellation and refund policy”
In “Cancellations and refunds” the default is: a customer who cancels at least 24 hours before play gets 100% back, at least 6 hours 50%, and later nothing. Change the numbers, add steps or delete them
Tap “Save policy”, even to keep the default: that is what ticks this step on the card
Below it, choose whether refunds go back as credit (recommended) or as a bank transfer (venues paid by slip only); after changing it, tap the “Save” that appears under it
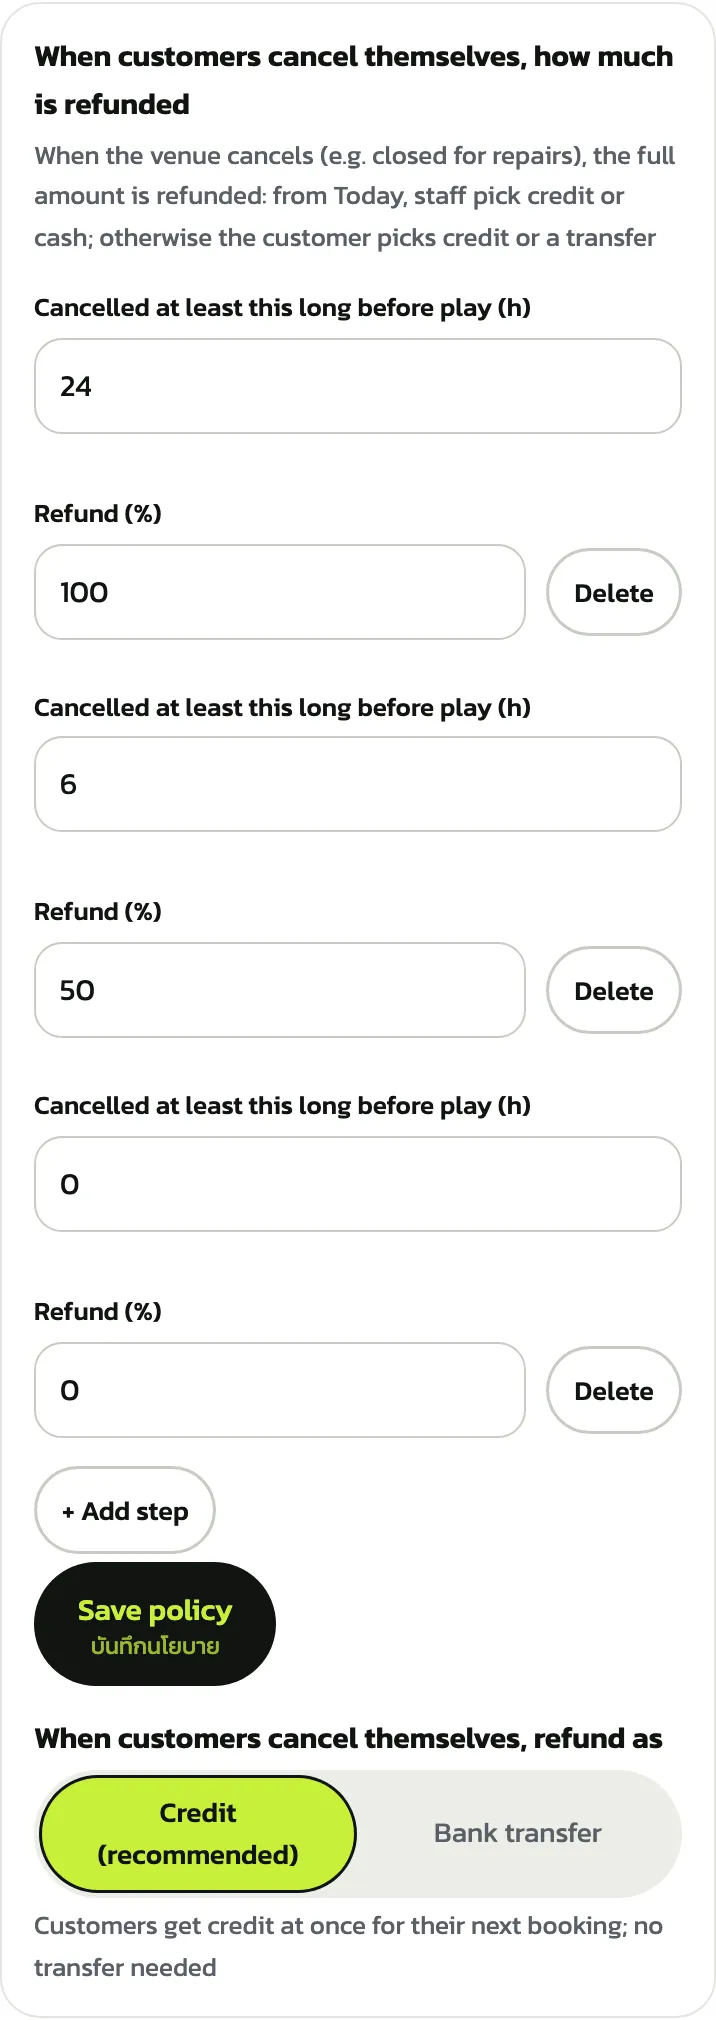
Step “Connect LINE OA”
No LINE OA yet, or not ready? Tap “Skip (no LINE)”. Customers can book through your venue's link right away, and you can connect LINE later
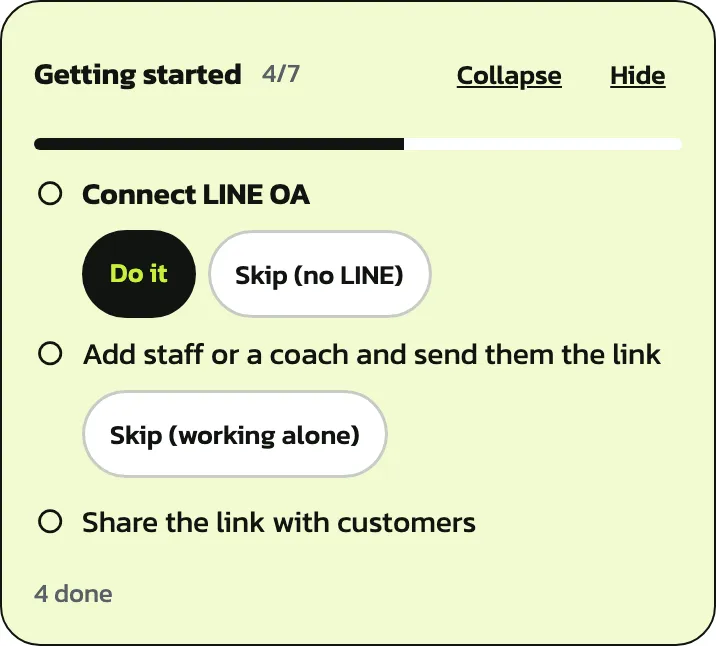
Step “Add staff or a coach and send them the link”
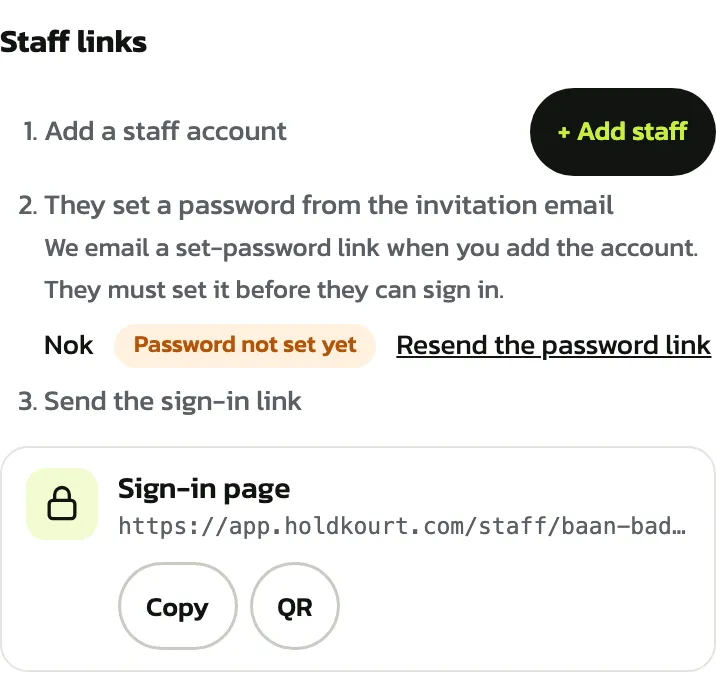
On “Share links”, tab “Front desk staff”, tap “+ Add staff”. It opens your staff list with the “Add staff” form
Working alone? “Skip (working alone)” on the card. During the trial you can add any number of staff; after it, Free has the owner only, Starter 2 people in all, Pro no limit
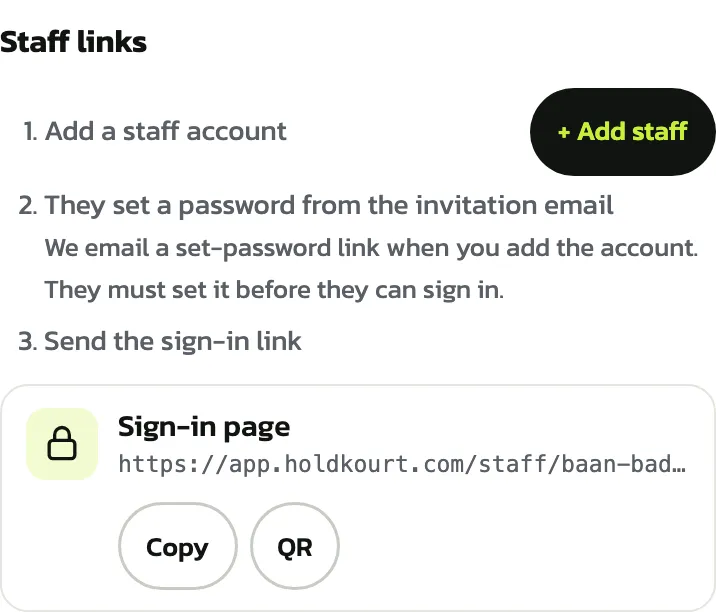
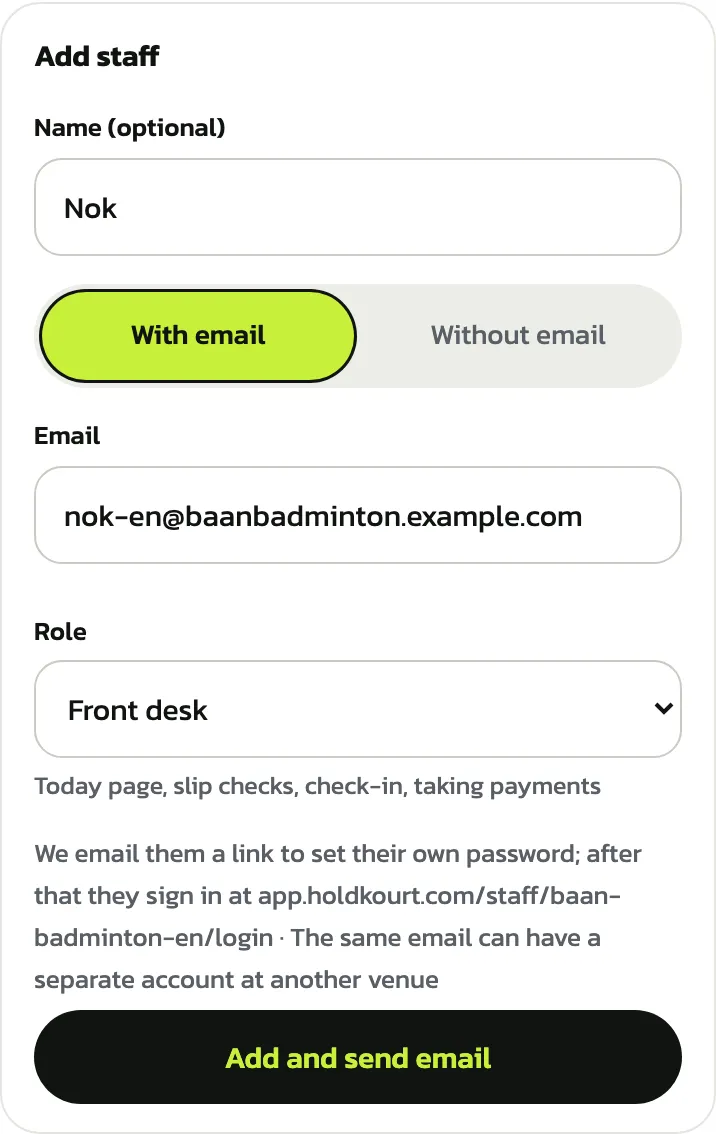
Fill in “Name (optional)”, choose “With email”, enter their email, pick a “Role” (manager, front desk or coach) and tap “Add and send email”
Staff without email: choose “Without email” and set a username and a temporary password instead
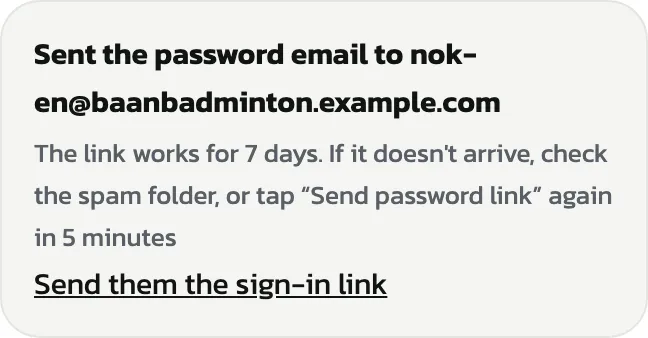
They get an email to set their own password; the link works for 7 days. Tap “Send them the sign-in link” to go back to “Share links”
Tap “Copy” on “Sign-in page” and send it to them by LINE or chat. They sign in there once their password is set
Step “Share the link with customers”
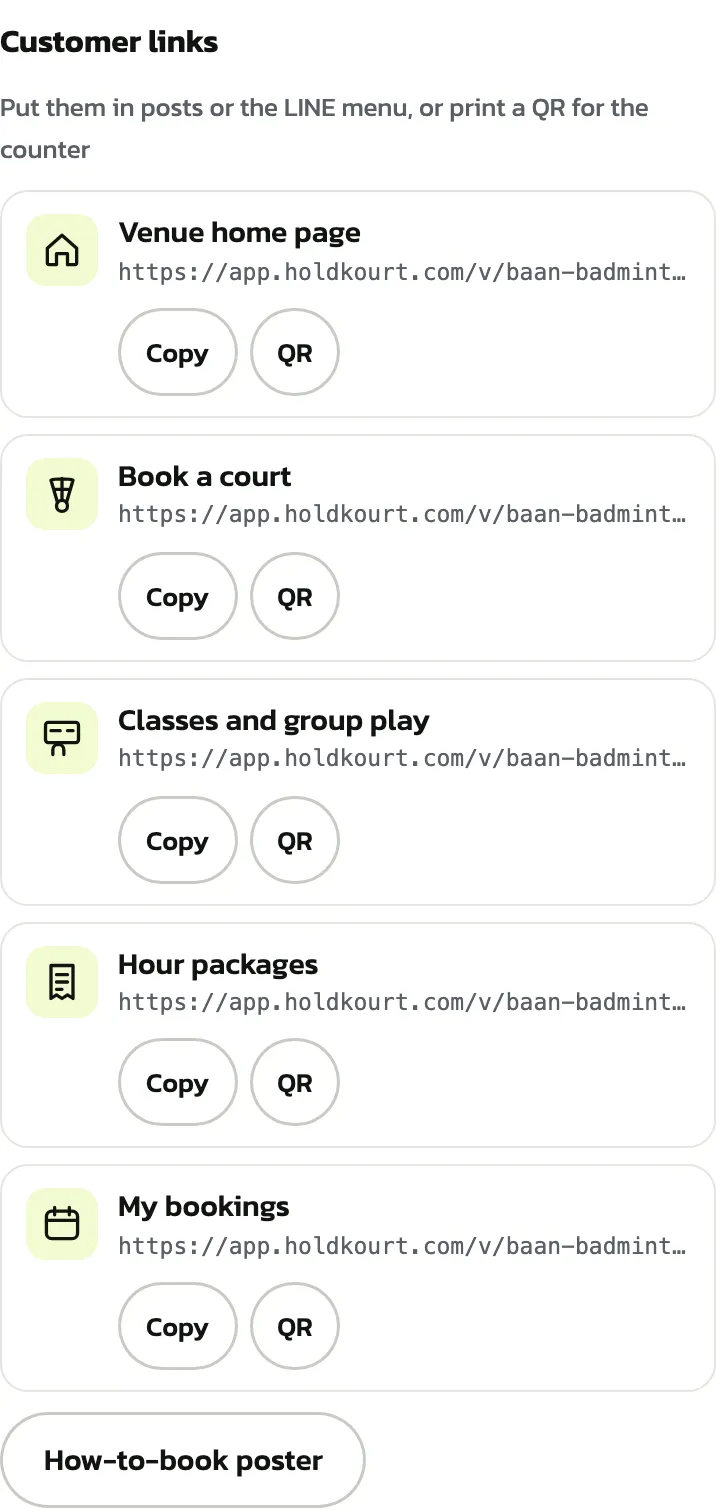
On “Share links”, customer tab, you find “Venue home page”, “Book a court” and other pages. “Copy” a link to put it in posts, your LINE menu or chats
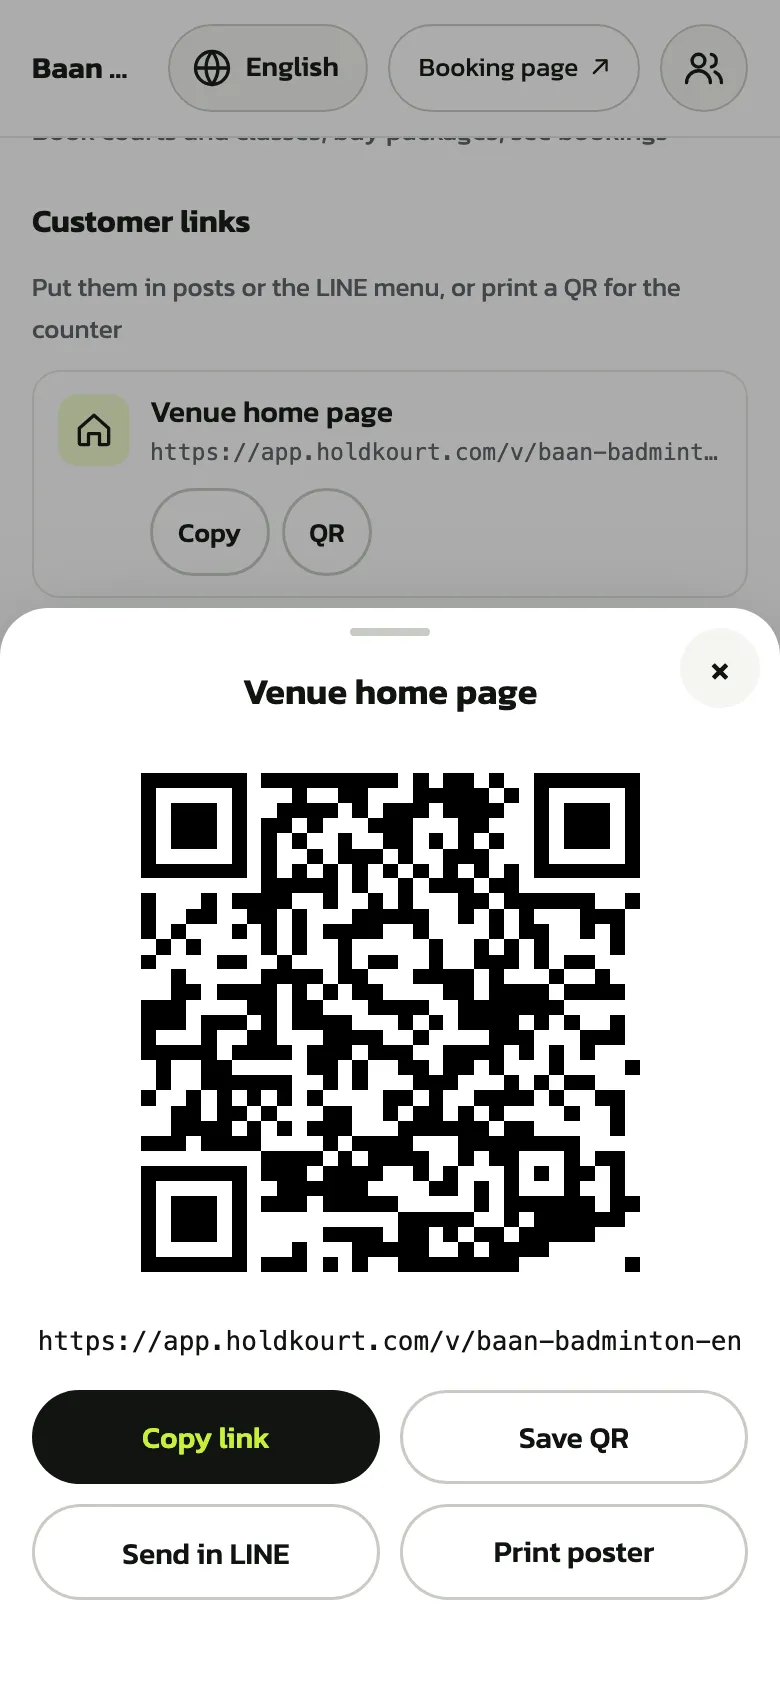
“QR” opens that link's QR code, with “Save QR”, “Send in LINE” and “Print poster” for your counter
Copying a link or opening a QR ticks this step on that device; the first real customer booking ticks it too
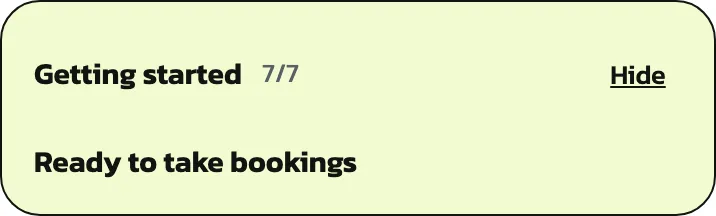
With every step done the card says “Ready to take bookings”. You can “Hide” it
Your account and getting help
The person icon at the top right (“My account”) has “Manage account”, “My alerts”, “User guide”, which opens this guide in a new tab, and “Contact the team / report a problem”, which opens a LINE chat with @holdkourt (on a computer it shows a QR to scan with your phone). Some pages, such as the slip queue, refunds and the settings tabs this guide explains, have a “How to use” button beside their heading that opens that page's section in this guide
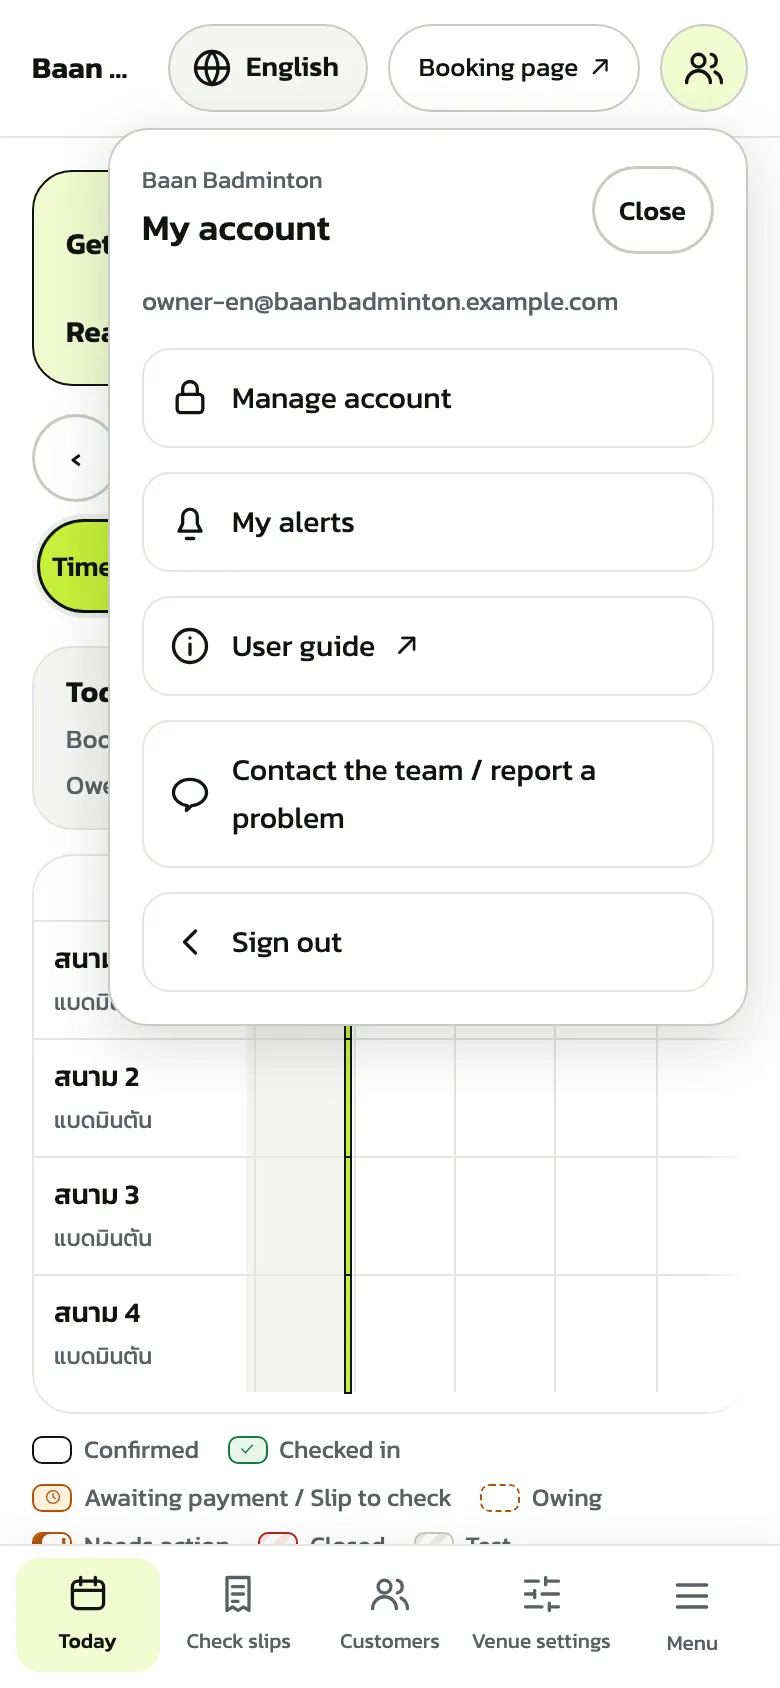
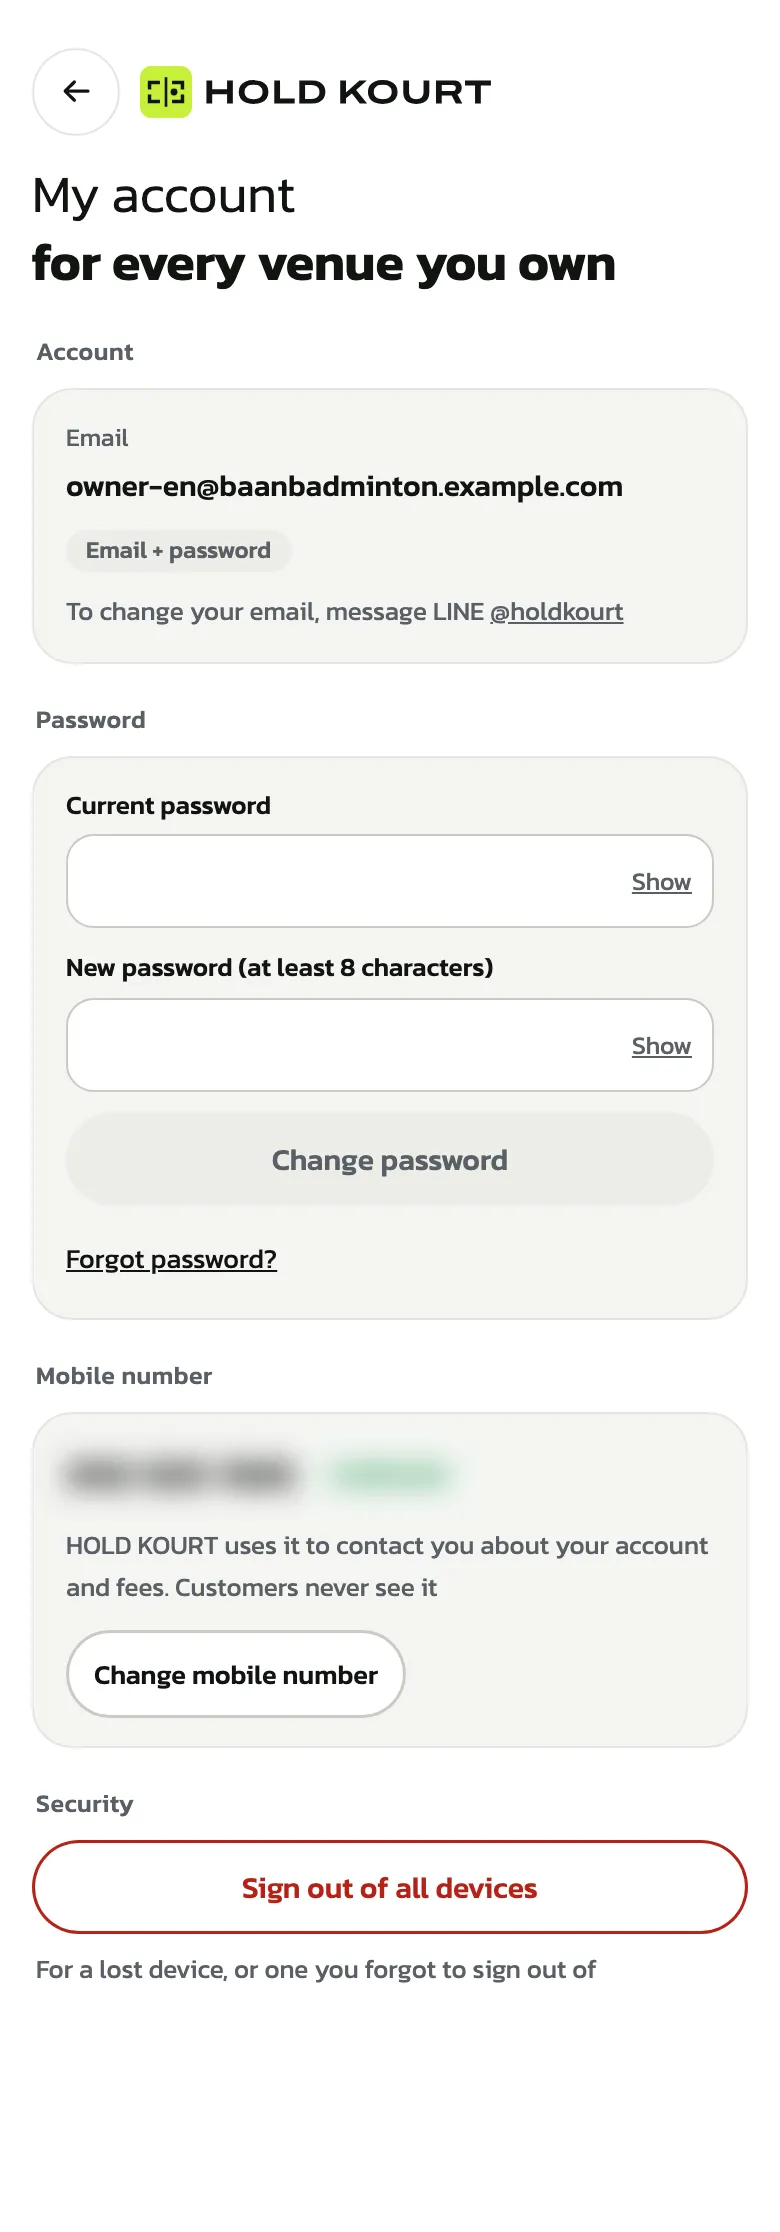
“Manage account” has “Change password”, “Change mobile number” and “Sign out of all devices” (for a lost phone). This account works for every venue you own. To change your email, message LINE @holdkourt
Signed up with Google? You see “Set a password by email” instead of “Change password”