Courts and branches
Everything in the “Courts and branches” group of Venue settings: the venue name and URL, opening hours and special days, the home page and cover photos, courts and sports, court add-ons, and adding a branch. Owners and managers can open the settings; a manager kept to some branches edits only the hours, courts, add-ons and branch of their own branches. Every picture is from a phone
The “Courts and branches” group
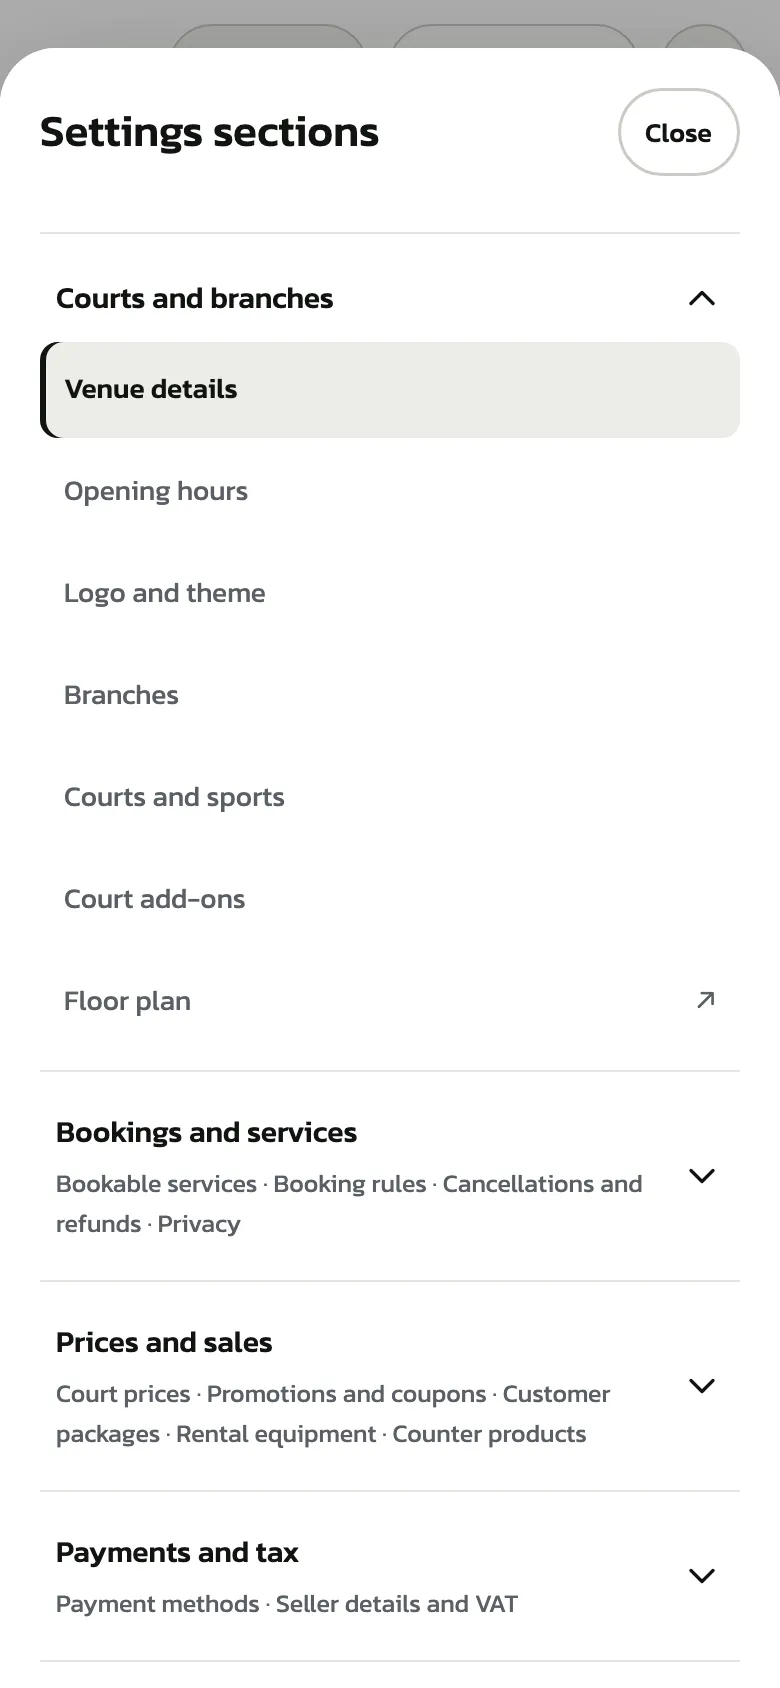
Tap “Venue settings” in the bottom bar, then the section button on the right. The “Courts and branches” group holds “Venue details”, “Opening hours”, “Logo and theme”, “Branches”, “Courts and sports”, “Court add-ons” and “Floor plan”. On a computer the list sits on the left of the page
“Floor plan” shows on the Pro plan and during the trial, and the plan can only be edited on a screen 1024 px wide or more, so this chapter has no floor plan steps yet
“Venue details”: name and URL
“Venue name” is the name customers see on every page. Tap “Edit”, type the new name and tap “Save”
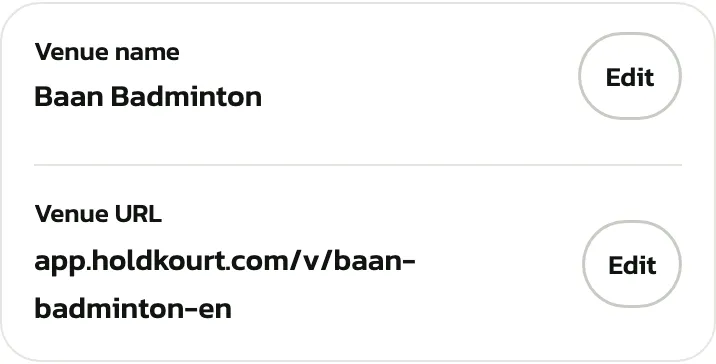
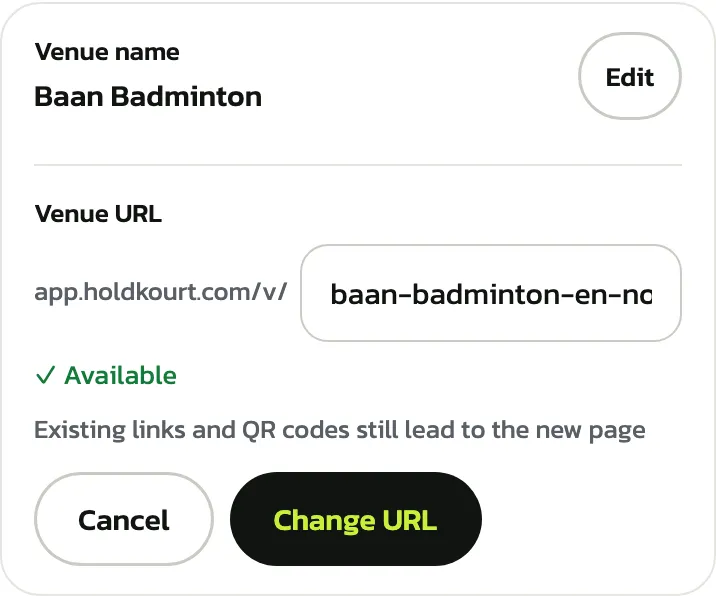
“Venue URL” is the booking page's link. Only an owner whose mobile number is verified can change it. Tap “Edit” next to the URL, type the new name (a–z, 0–9 and hyphens, 2–41 characters), wait for “✓ Available”, then tap “Change URL”
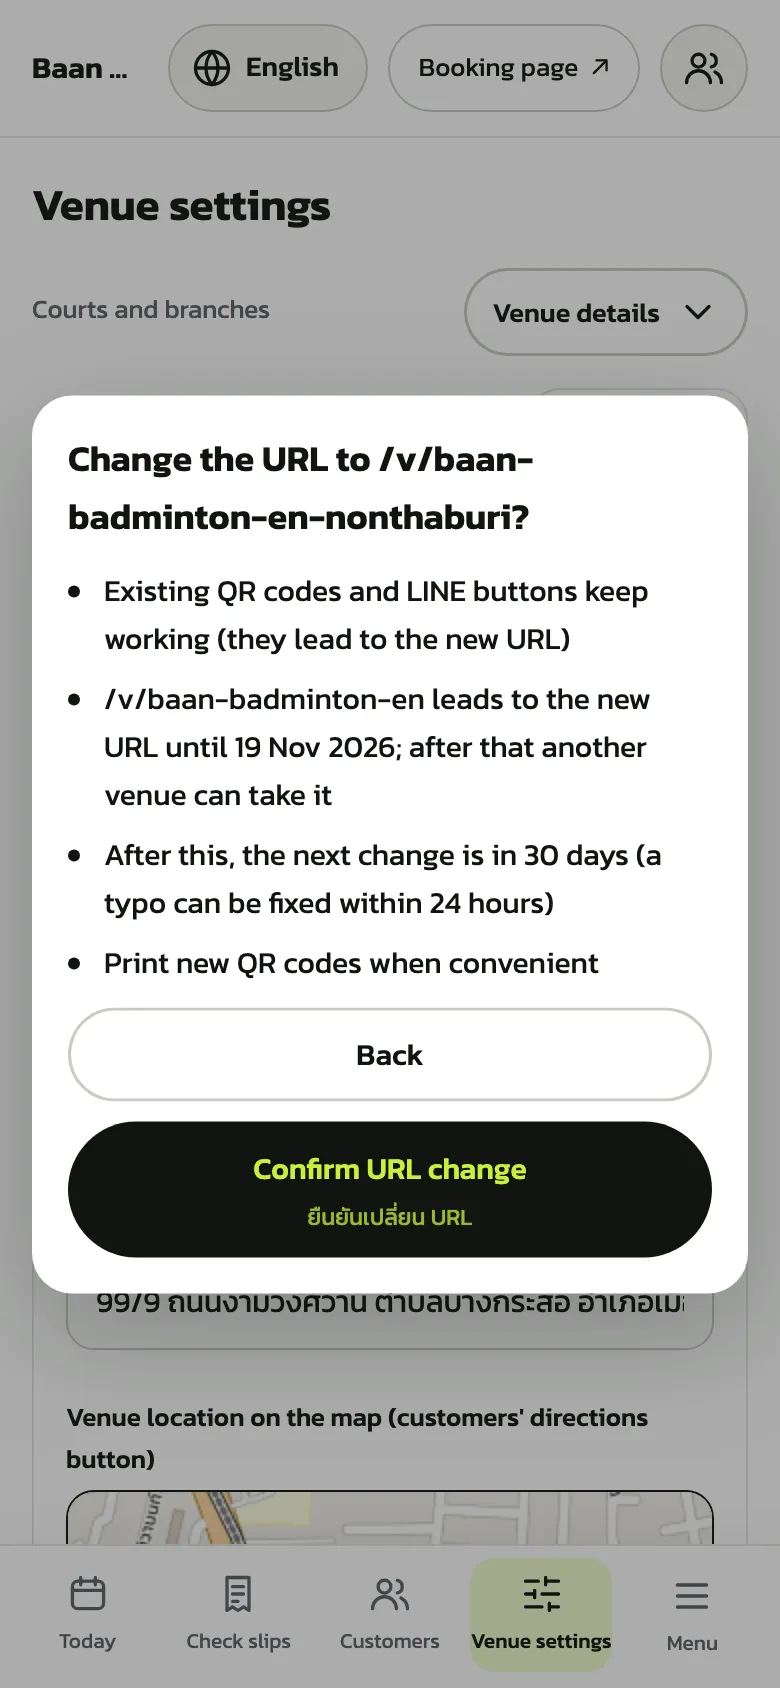
The confirm window says what will happen first: QR codes and buttons in LINE keep leading to the new URL, after a change the next one waits 30 days (a typo can be fixed within 24 hours), and it's worth printing new QR codes when convenient. Read it, then tap “Confirm URL change”, or “Back” if you're not sure
An old URL used for less than 7 days forwards to the new one for 7 more days, after which another venue may take it. One used for 7 days or more stays yours for good. In this picture we tapped “Back” and changed nothing
The address and map pin are below the name on the same page; how to fill them in is in the Getting started chapter. The phone number is edited on the branch in the “Branches” tab. With several branches, each branch sets its own address, phone and pin in the “Branches” tab
“Opening hours”
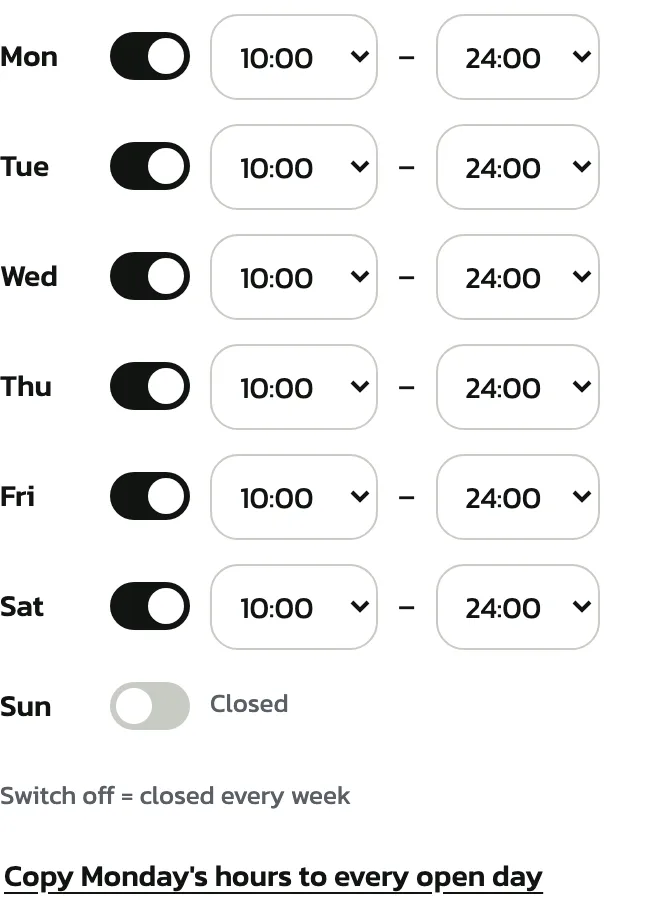
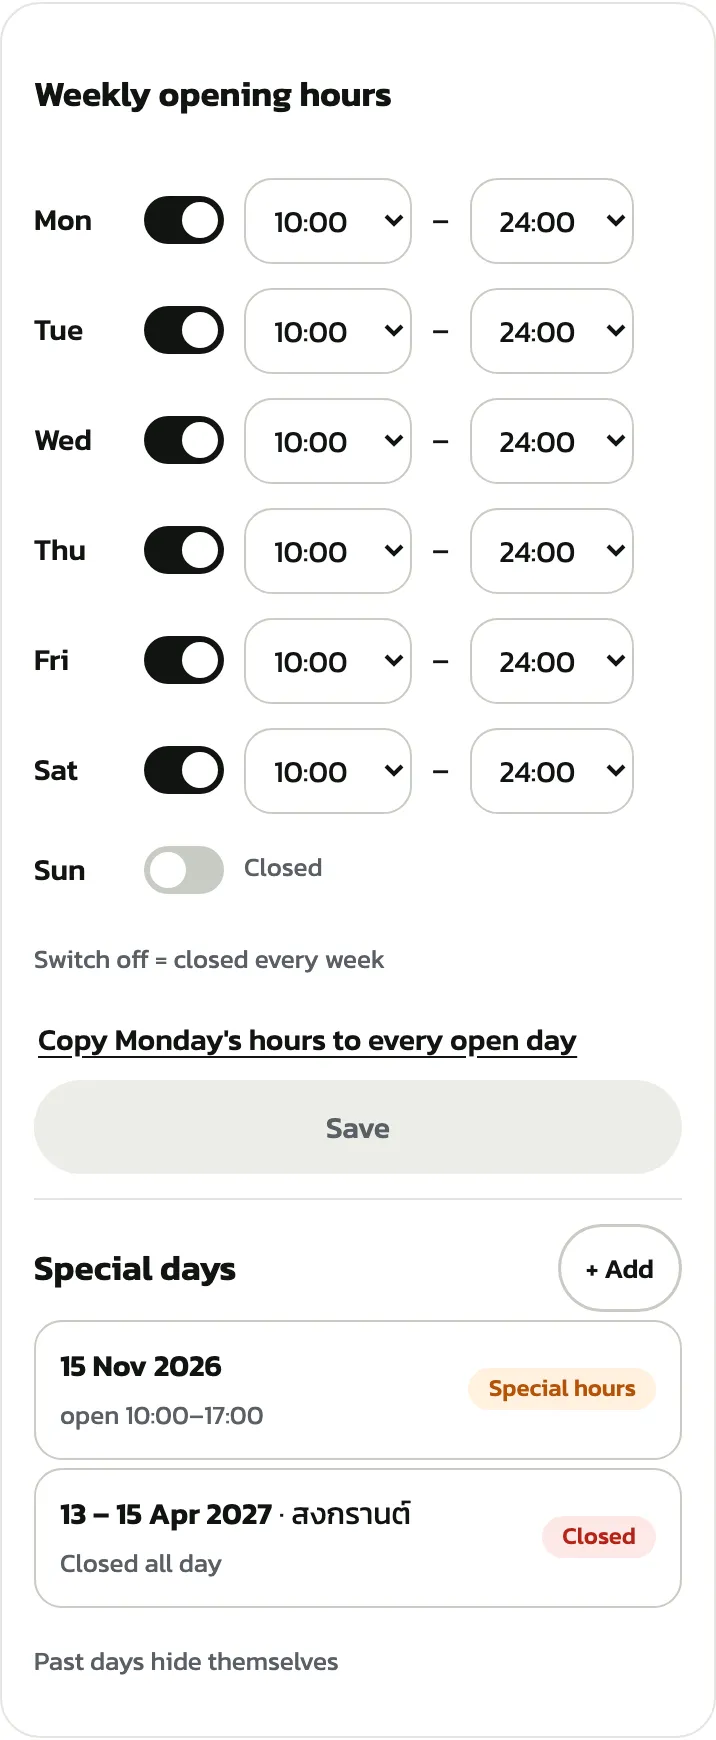
Under “Weekly opening hours” each day has a switch and opening and closing times. Switching a day off closes it every week. Set Monday, tap “Copy Monday's hours to every open day” to give every open day the same hours, then tap “Save”
At least one day must stay open. To close for good, close the branch
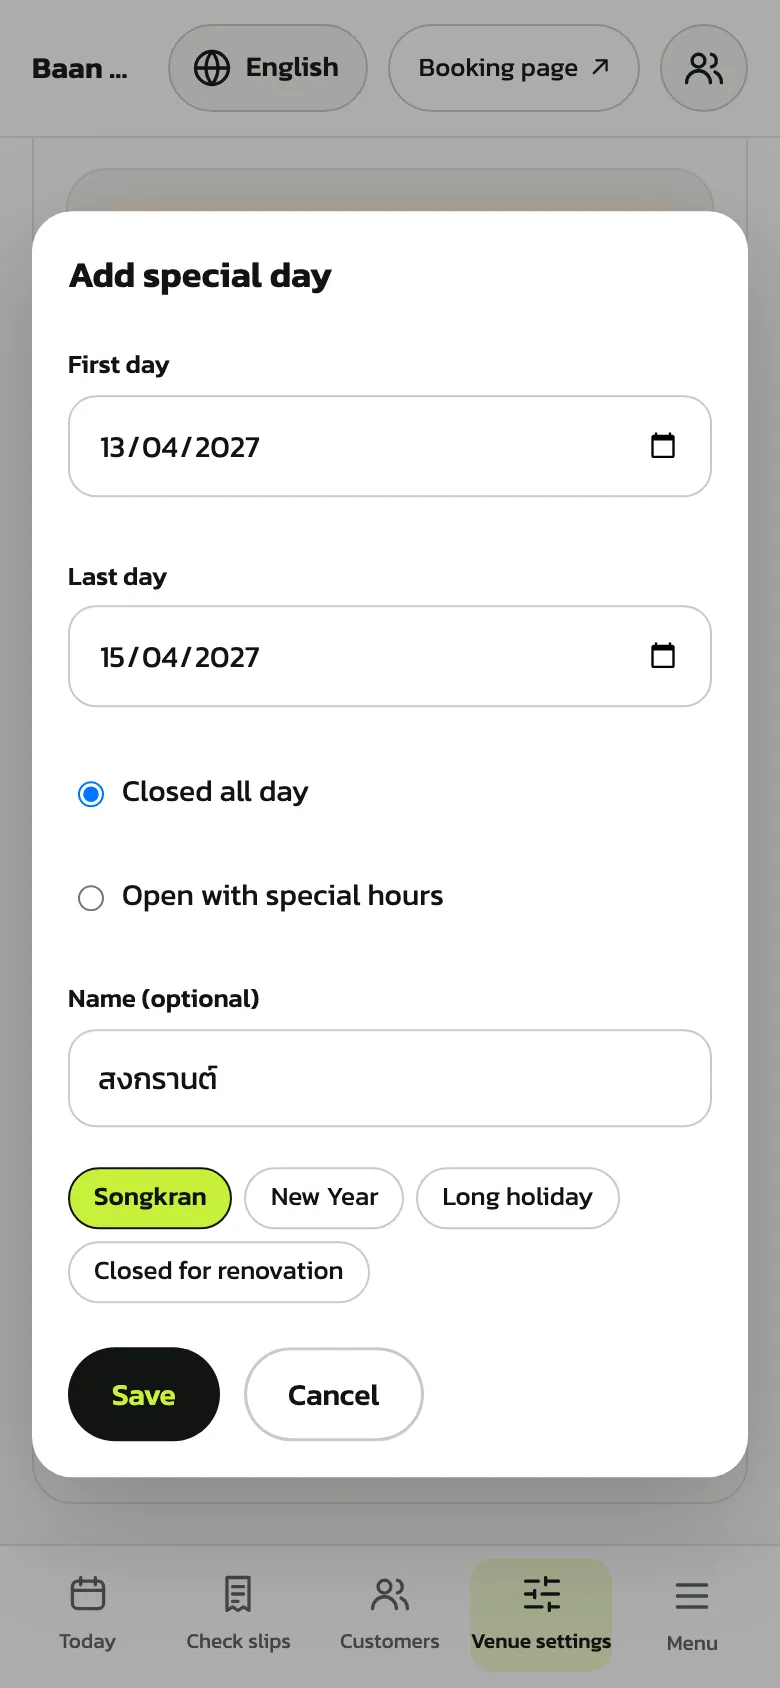
For a holiday or a day with unusual hours you don't change the weekly hours. Under “Special days” tap “+ Add”, pick the “First day” and “Last day”, choose “Closed all day”, add a name if you like (or tap a suggested one), then tap “Save”
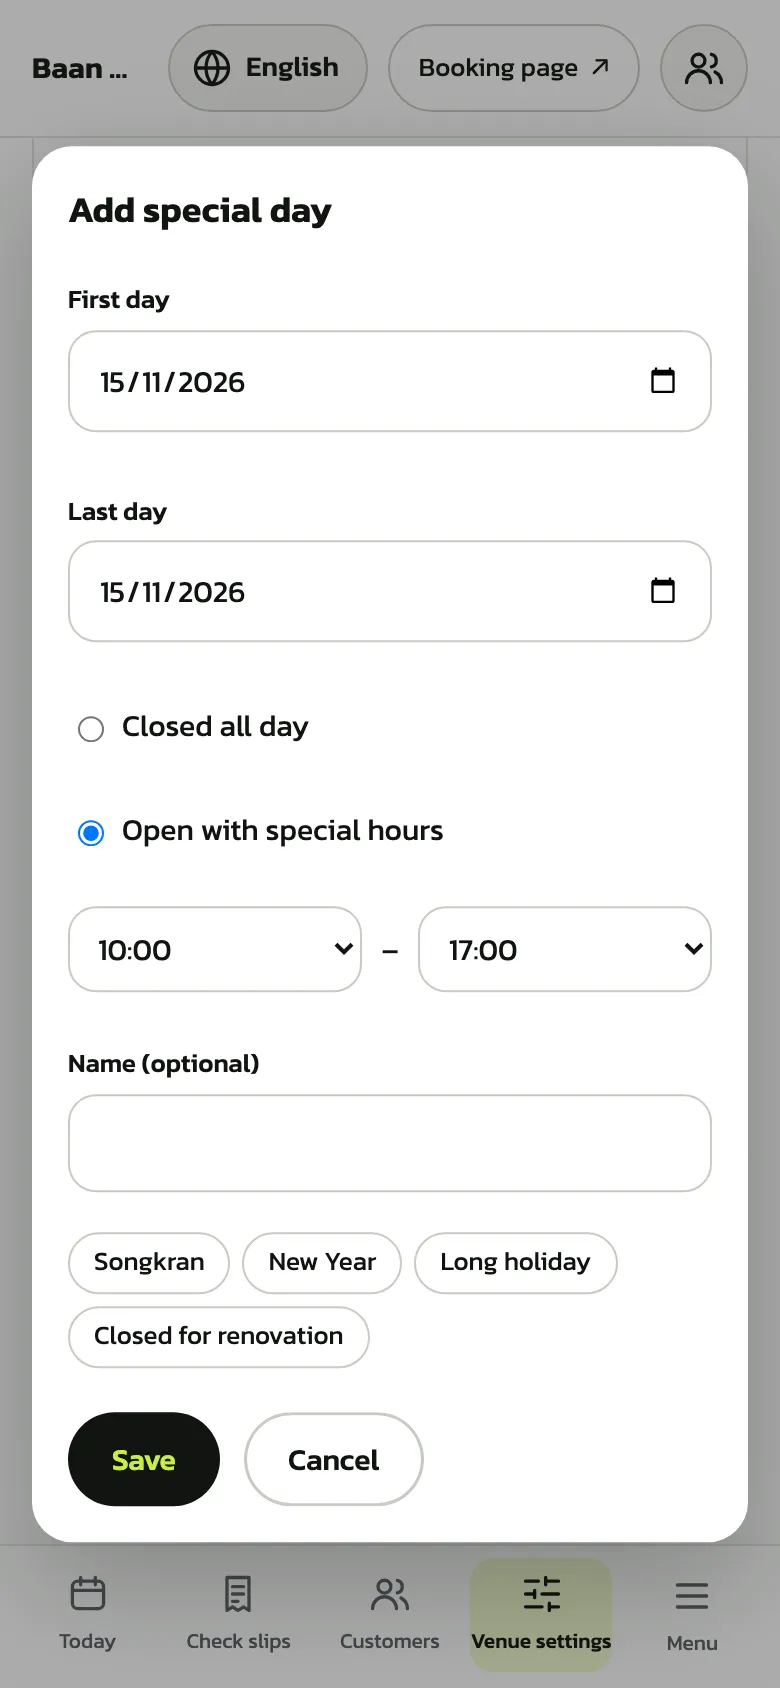
For a day that opens shorter or longer than usual, choose “Open with special hours” and pick that day's opening and closing times
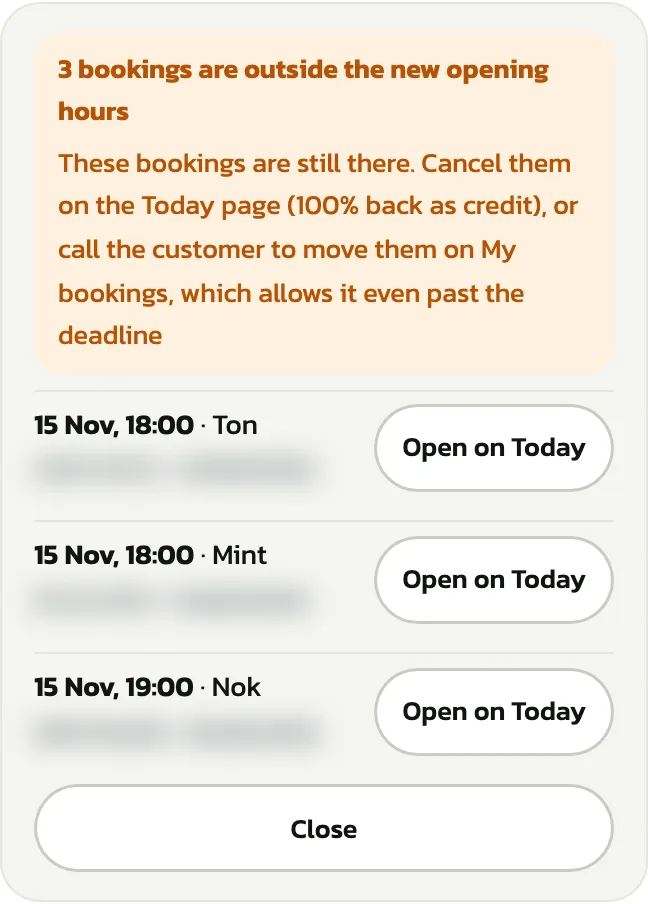
After you save the weekly hours or a special day, the page lists any bookings or classes/groups left outside the new hours. They stay booked; nothing is cancelled for you. Tap “Open on Today” to cancel one with a full refund (as credit or cash), or call the customer to move it themselves on My bookings
The customer's phone number is blurred Special days are listed under the heading. “Closed” means closed all day, “Special hours” means unusual hours. Tap one to edit or delete it. Days that have passed hide themselves
Home page and cover photos
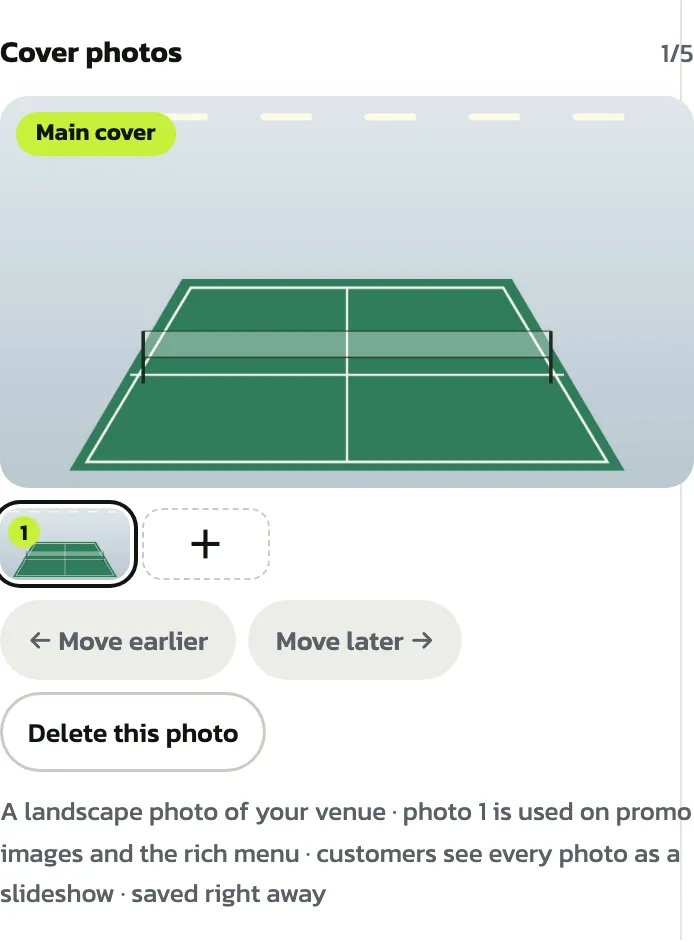
In “Logo and theme”, the “Home page” heading has two groups of layouts, with and without a cover photo. Tap the “With cover photo” tab, then + to add a landscape photo of the venue: up to 5 photos; the app shrinks them for you. Photo 1 is the “Main cover”, also used on the promo poster and the LINE menu. Customers see every photo as a slideshow. Cover photos are saved right away
Without a cover photo customers see a drawn picture of the court instead
Tap the home page layout you like, then “Save” at the bottom of the page. A layout works with any theme. How to add the logo and pick a theme is in the Getting started chapter

“Courts and sports”
Tap “+ Add court” under the sport. The new court is named “สนาม” (court) with the next number. Each court has arrows to order it (the order is used on the booking page and the schedule), “Rename” and “Stop bookings”. Untick “Online booking” and customers can't book that court themselves; it can only be booked at the counter
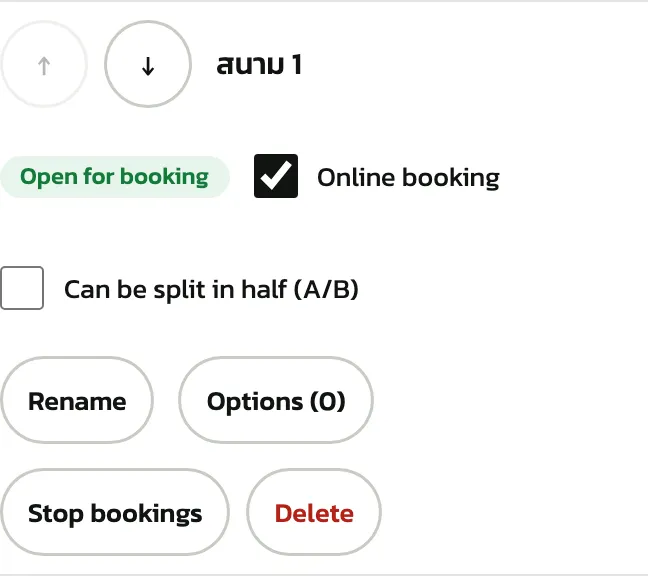
For a court that can be split, tick “Can be split in half (A/B)”. The first time for a sport, enter the “Half-court price per hour (baht)” (it applies to every court of that sport) and tap “Split the court”; after that, ticking splits the court at once. Customers can then book half A or half B separately. The half-court price can be changed later in the prices tab
Untick it to join the halves back into one court; that works while no half has bookings ahead
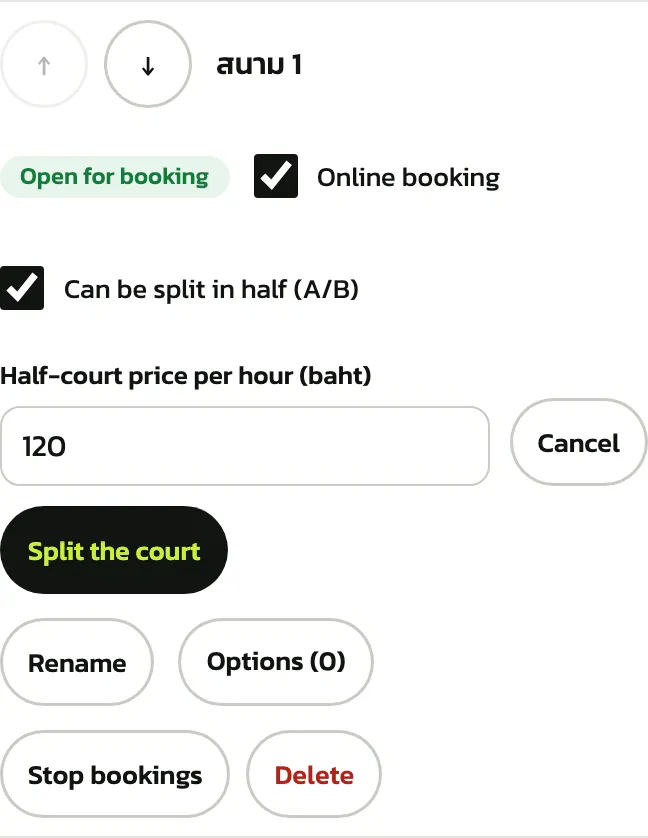
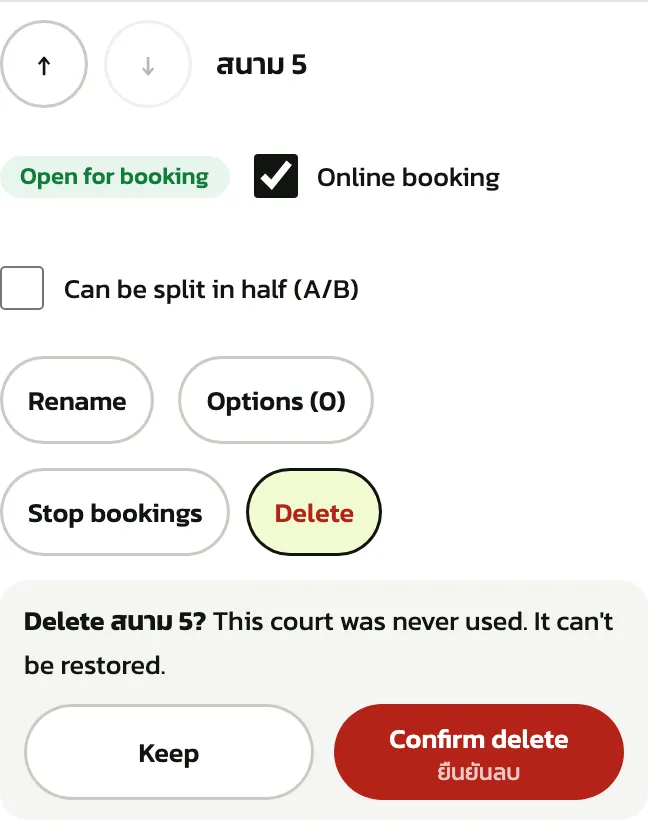
Tap “Delete” on the court. A court never used is deleted for good. A court with past bookings can be deleted too, and booking history, receipts and reports keep its name. Deleting a used court also cancels repair closures set ahead. Tap “Confirm delete” or “Keep”. A court with bookings or classes still to come, or one on the floor plan, can't be deleted; the page says why
To close a court for repairs for a while, do it on the Today page instead of deleting it
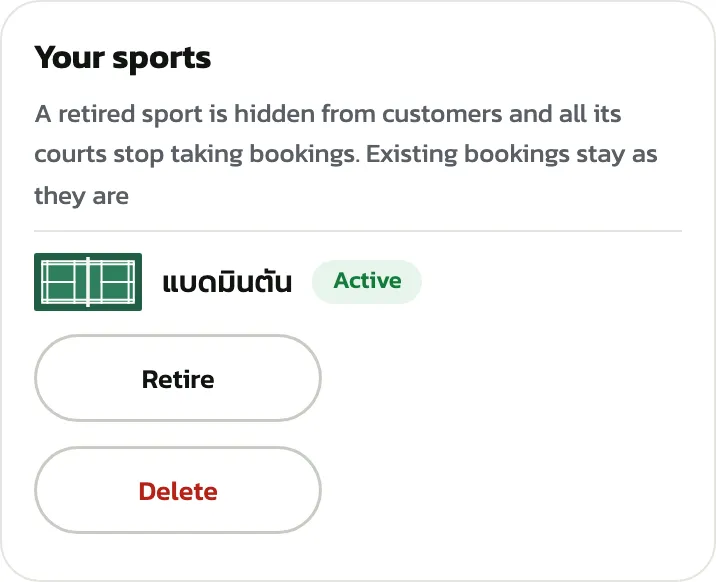
“Your sports” applies to every branch. “Retire” hides the sport from customers and stops bookings on all its courts; existing bookings stay as they are. Tap “Use again” to bring it back, then open its courts one by one
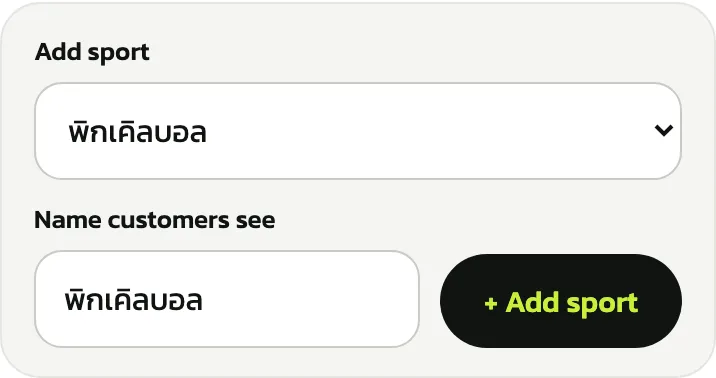
To add a sport, pick it under “Add sport”, change the “Name customers see” if you like, and tap “+ Add sport”. Then tap that sport's “+ Add court” and set its base price in the prices tab
“Court add-ons”
An add-on, such as air conditioning, is charged per hour on top of the court price, and customers choose it when booking. Tap the sport under “Add an extra for:”, fill in “Add-on name” and “Surcharge (baht/h)”, every court starts picked: tap a court that doesn't have it to take it off (or tap “Untick all” and pick your own), then tap “Add to courts (…)”
On a split court, half A and half B are picked separately. For a court that charges differently, use “+ Court's own price”
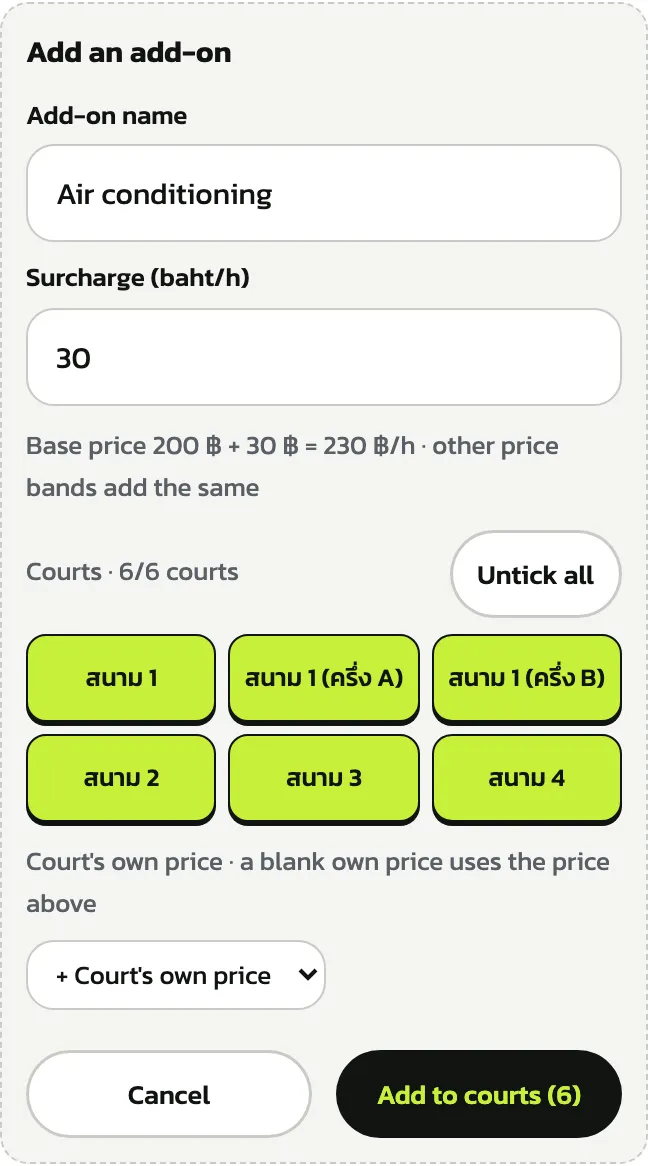
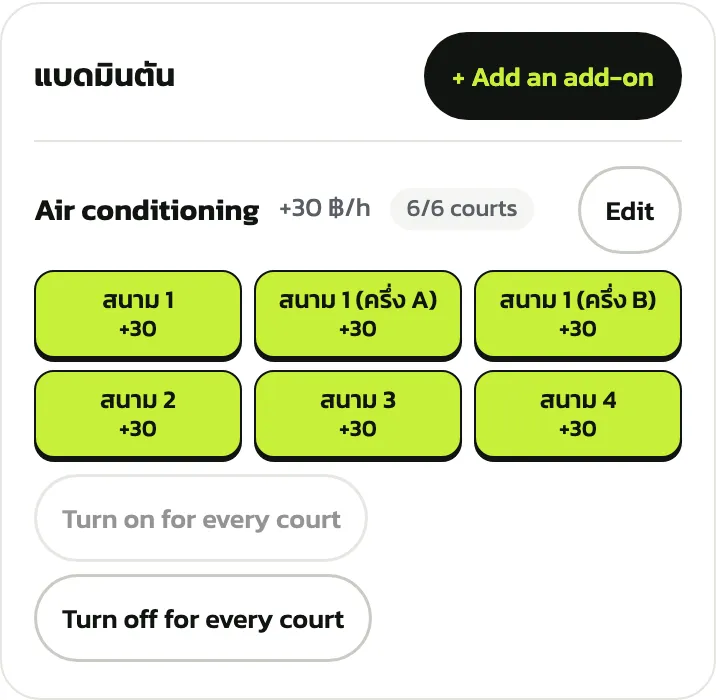
Each add-on has a button per court: tap it to turn the add-on on or off for that court. “Turn on for every court” and “Turn off for every court” do all courts at once. Tap “Edit” to change the name or price. Existing bookings keep the name and price they were booked with
“Branches” Pro
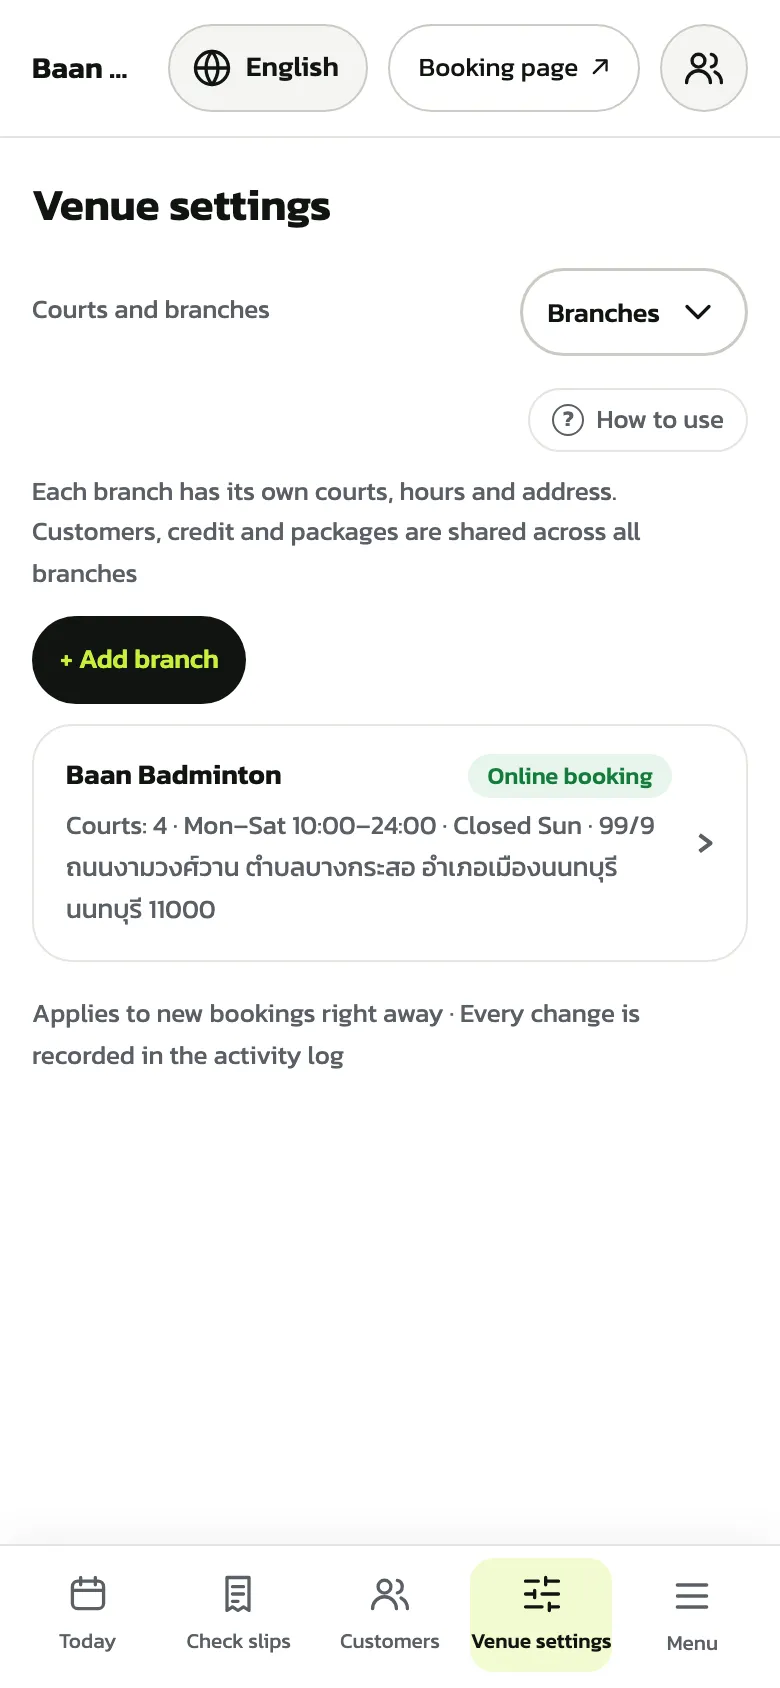
Several branches come with the Pro plan and the trial. Each branch has its own courts, opening hours and address; customers, credit and packages are shared by every branch. The owner taps “+ Add branch”
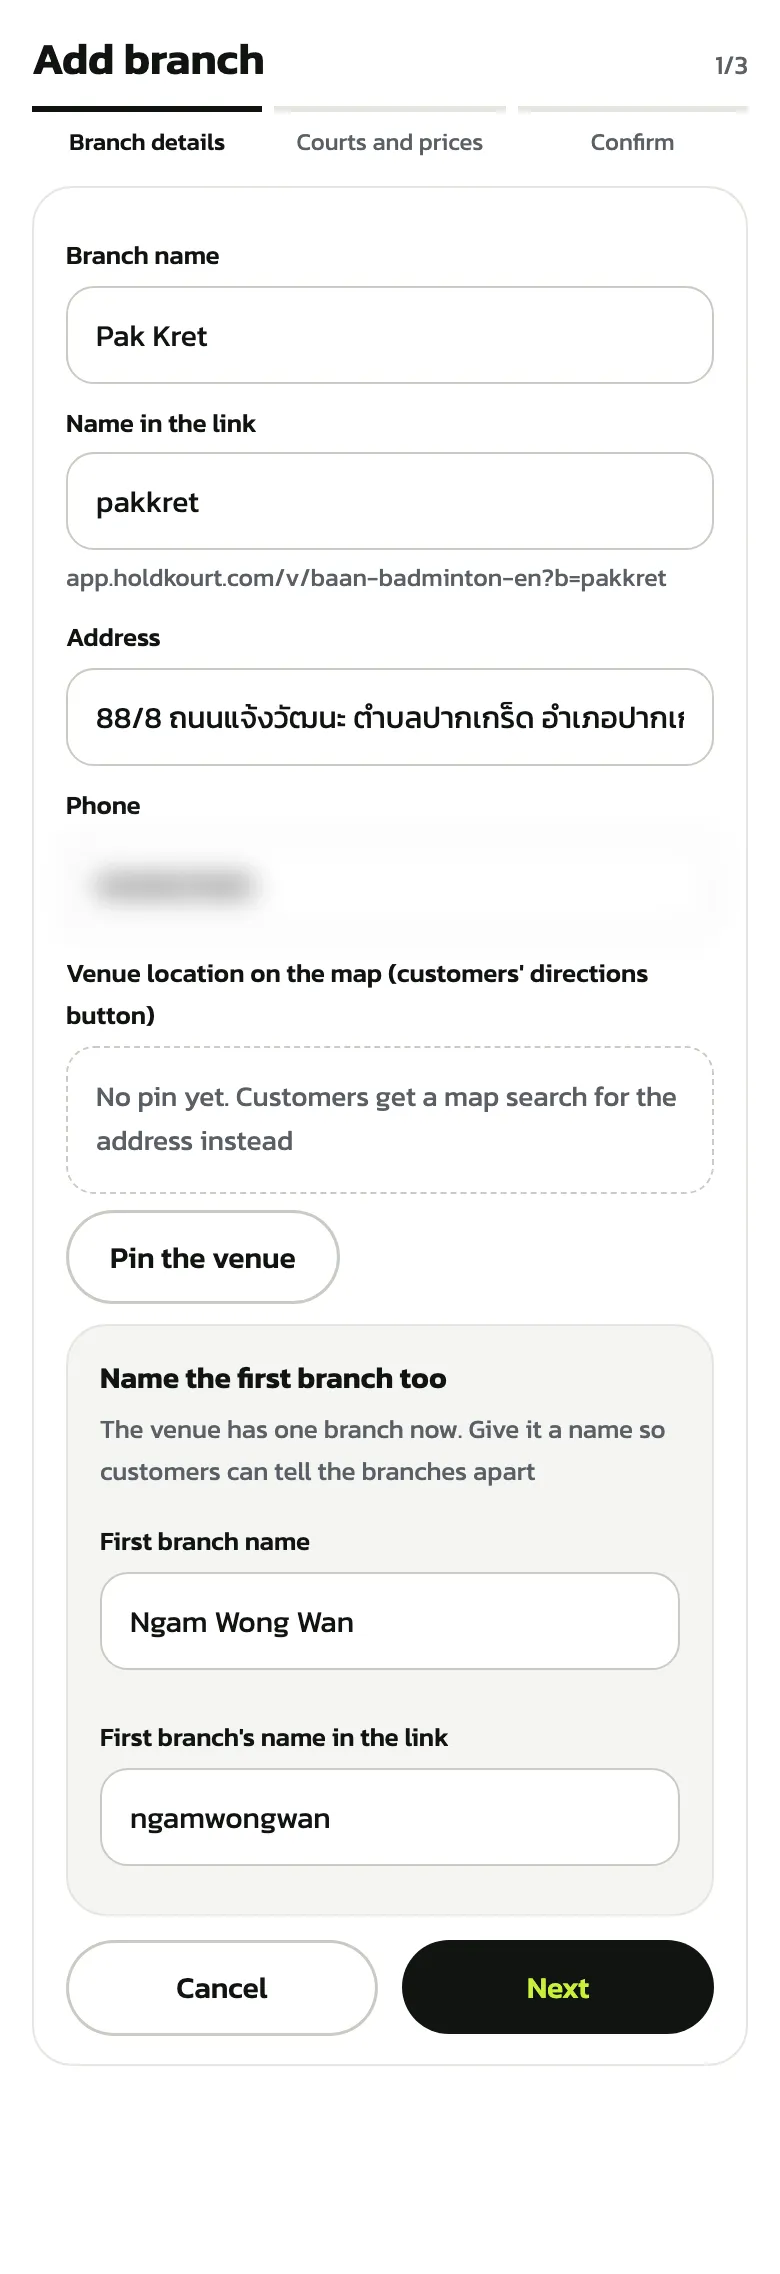
Step 1, “Branch details”: enter the “Branch name”, the “Name in the link” (added to the booking link as ?b=), “Address” and “Phone”, and pin the map if you like. If the first branch has no name yet, there is a “Name the first branch too” box, so customers can tell the branches apart. Then tap “Next”
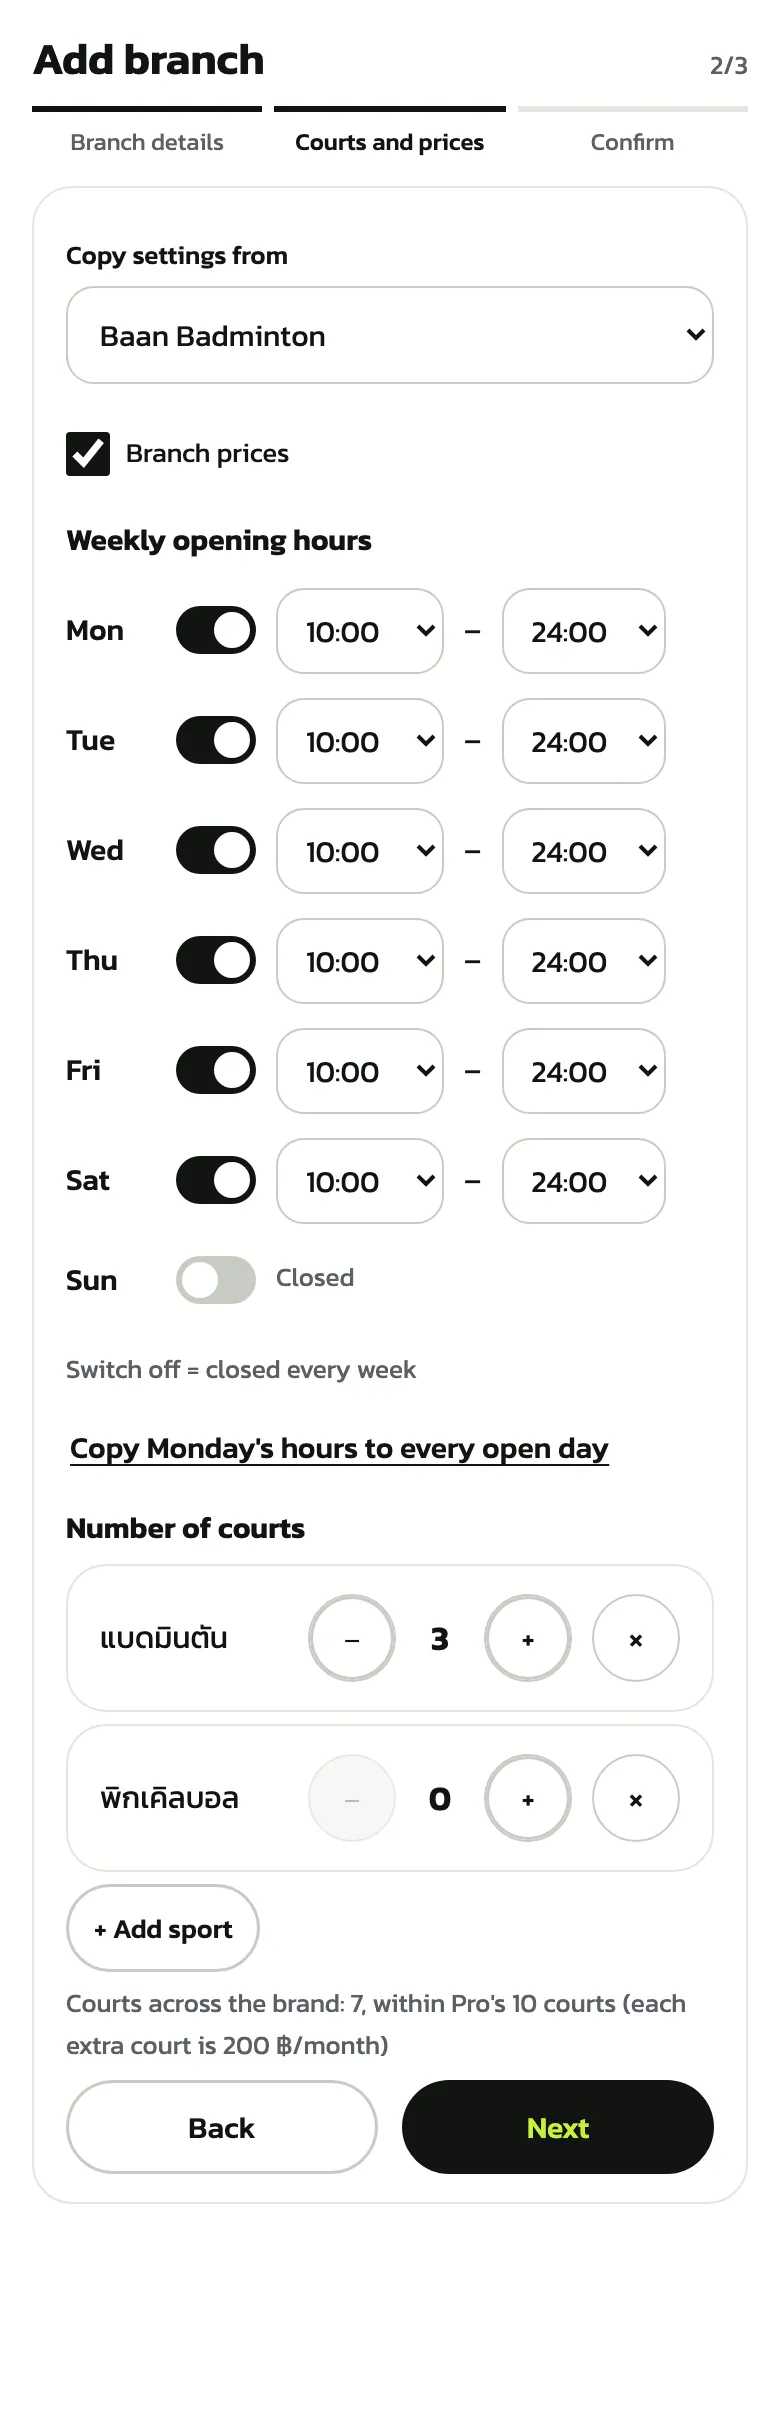
The phone number is blurred Step 2, “Courts and prices”: pick a branch under “Copy settings from” and keep “Branch prices” ticked to copy its prices too. The weekly opening hours start from that branch and can be changed. Tap + to set the number of courts for each sport (a new sport can be added with “+ Add sport”). Below the list it says how many courts the whole brand will have. Then tap “Next”
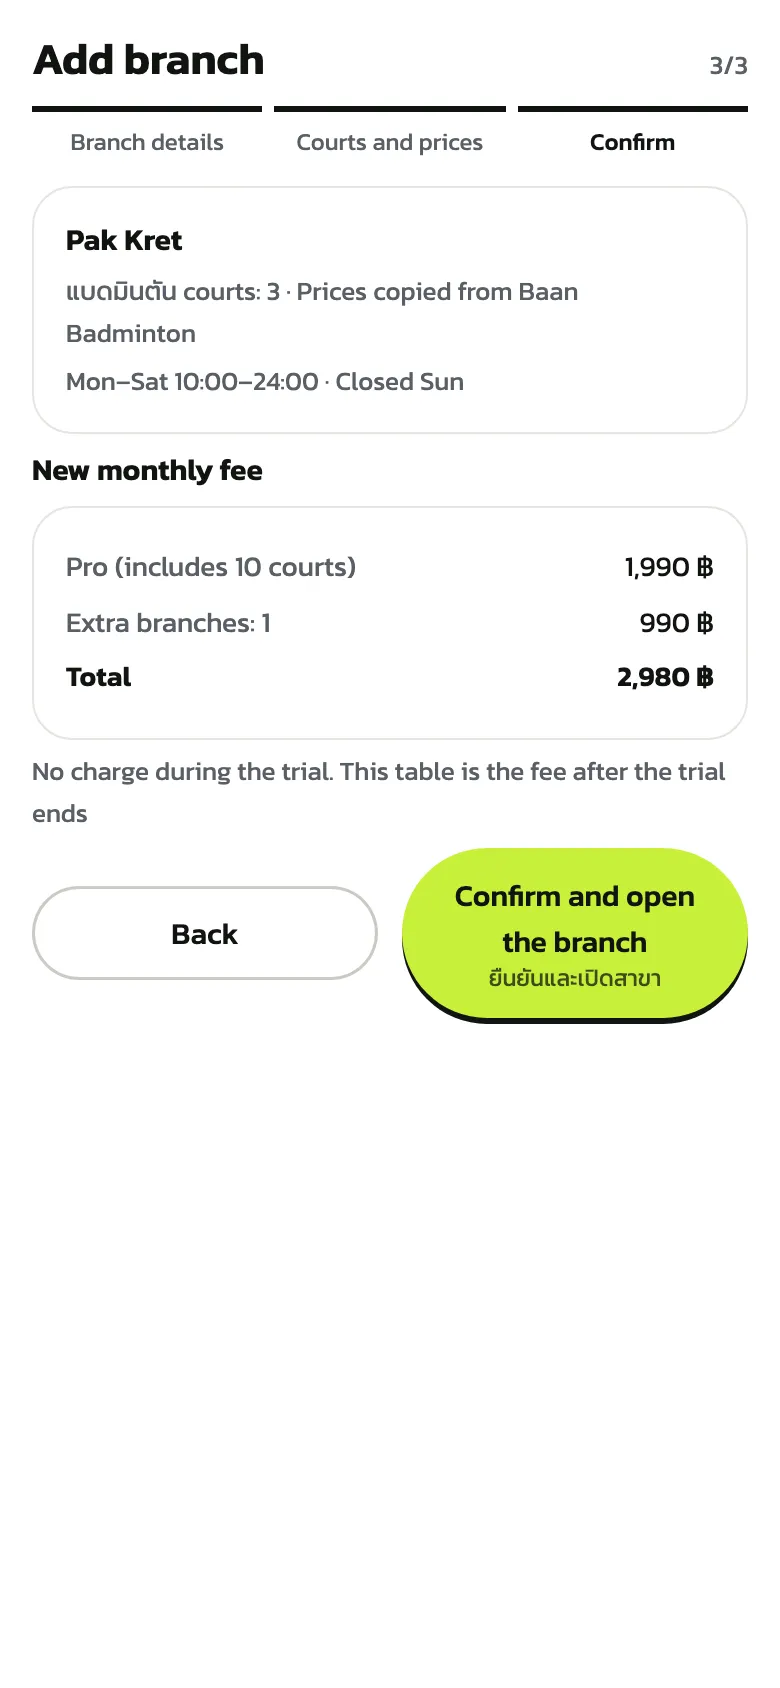
Step 3, “Confirm”: check the branch summary and the new fee table. The trial costs nothing; the table is the fee after the trial. Then tap “Confirm and open the branch”
After the trial, or on a paid Pro plan, this step always shows what will be charged before you confirm
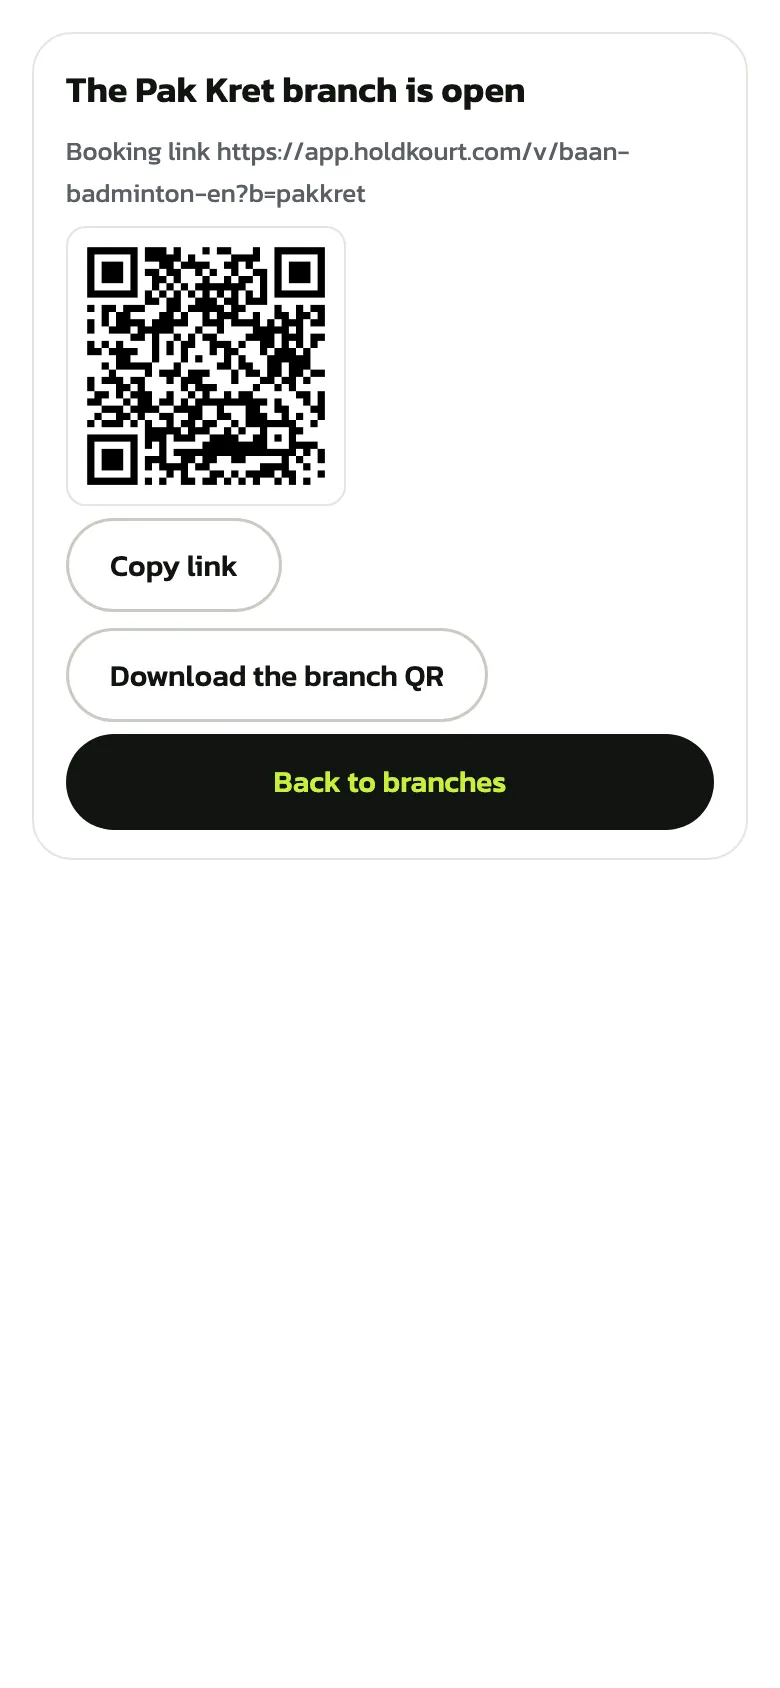
Once the branch is open, the page shows its booking link. Tap “Copy link” or “Download the branch QR” to hand it to customers, then “Back to branches”
When a payment is due, this page says it is waiting for the payment and the branch opens once it is paid; until then the Branches tab shows it as “Awaiting payment”
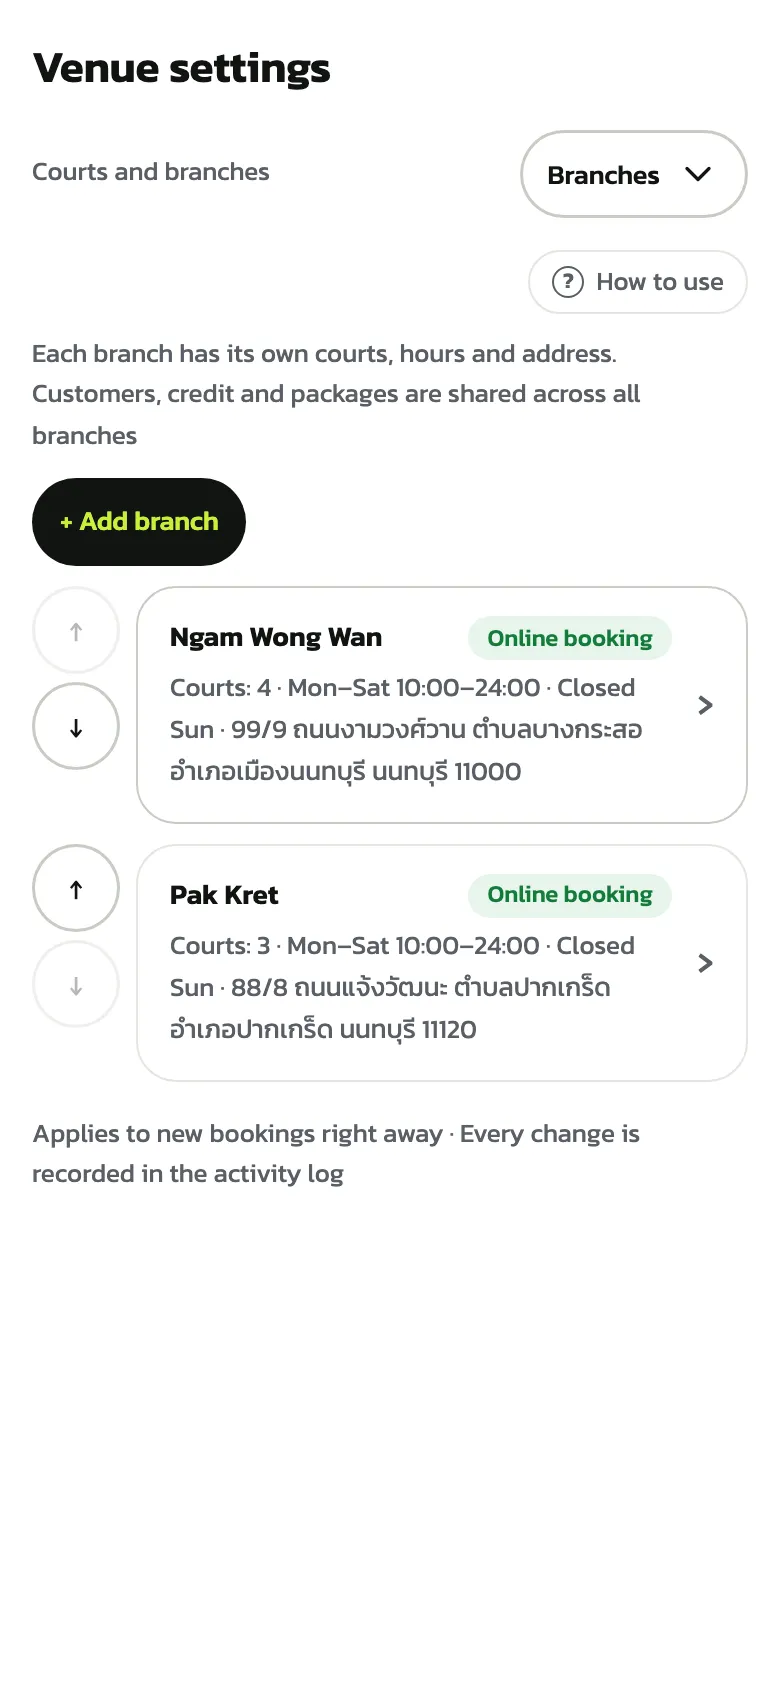
The “Branches” tab lists every branch with its courts, hours and address. Use the arrows to order them and tap a branch to edit it. From 2 branches on, the opening hours page has a branch picker and the courts page is split by branch
Staff per branch Pro
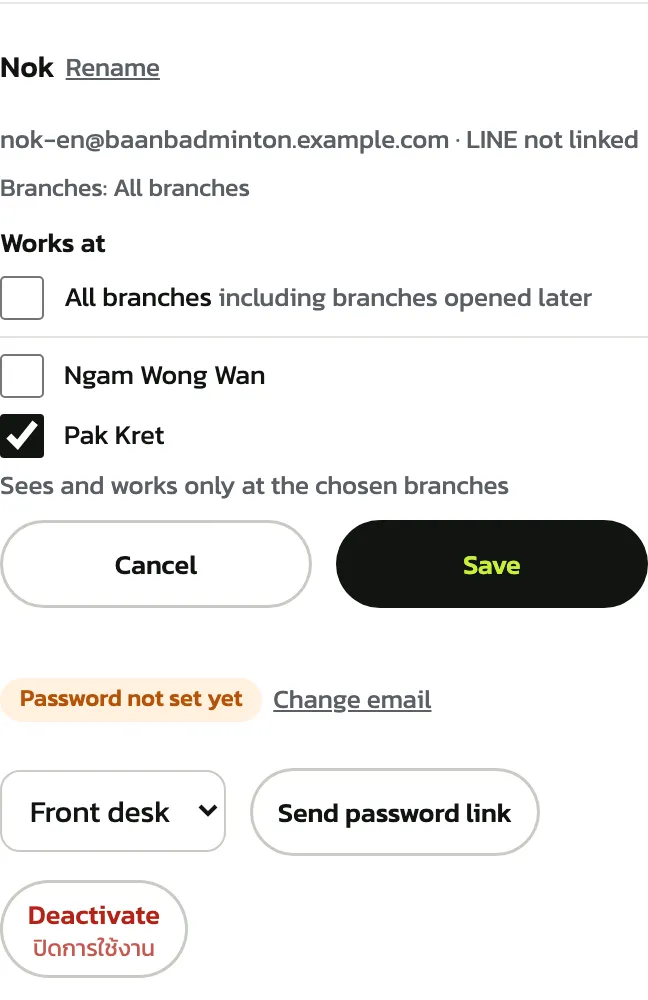
At a venue with several branches, each row shows the branches the person works at; people who were there before the new branch opened work at every branch. Press “Edit branches” and choose under “Works at”: tick “All branches” or only some, then press “Save”. They then see and work only at the chosen branches. “All branches” includes branches opened later
The owner's own row has no “Edit branches” button, managers can change branches for front-desk staff and coaches only, and with several branches the add staff form needs a branch picked before it can add